Creating a remapping config and running a dead disk client
In this section we explain the various way to create remapping configs for a disk image, how to apply the remapping, and show how the dead disk client can be used in the GUI.
A dead disk remapping can be created in the GUI or using the CLI’s deaddisk command. Under the hood, both methods use the same built-in artifact to inspect the disk image and create the remapping. Here we will primarily discuss the GUI-based approach and we refer you to the CLI documentation if you’d prefer to use a CLI-only approach.
In general, when running the virtual client with a remapping config we start it
via the CLI, although the Server.Utils.DeadDiskClient artifact does provide an
example of how the virtual client can be launched using VQL’s execve() plugin.
Supported disk image formats
Velociraptor currently supports the following disk image formats via it’s built-in accessors:
-
raw format: a bit-by-bit copy of a hard drive, also know as “DD” or “flat” format. The file extension is often
.imgbut there is no standard. -
VHDX: virtual hard drive format introduced by Microsoft, usually having the.vhdxfile extension. -
EWF: Expert Witness Compression Format, sometimes called “E01 images” and having the.e01,.e02etc. file extensions. -
VMDK: virtual hard drive format introduced by VMware, usually having the.vmdkfile extension.
VMDK format variants
Most virtual machine platforms can export to several formats. In particular,
note that VMware can export to raw format, but it always retains the .vmdk
file extension. In that case you would need to either:
- remove the file extension so that Velociraptor’s
deaddiskcommand will treat it as a raw image (which it actually is) instead of VMDK format, or - specify the format accessor using the
Accessorparameter when running theGeneric.Utils.DeadDiskRemappingartifact.
The Generic.Utils.DeadDiskRemapping artifact (which is also used by
Server.Utils.DeadDiskClient and the deaddisk CLI command) recognizes the
first three formats based on file extension and Velociraptor is able to read
these formats natively without any additional steps. If the target image file
has any other extension then it will be regarded as raw format.
Dealing with unsupported image formats
If you have a disk image in some other unsupported format then the recommended course of action is to “cross-mount” the image to raw format. There are several tools which can do this, for example xmount.
Alternatively you can convert the image to one of the natively-supported formats. Many tools exist which can do this, and usually this includes the virtualization platforms themselves. The downside of converting formats is that it requires a lot of disk space and can take a long time. Therefore cross-mounting is usually preferable because it “translates” one format to another on-the-fly without conversion.
In addition to unsupported image formats you may also have to deal with other filesystems, partition systems, and disk encryption. In such circumstances we recommend that you consider using guestmount and the many other excellent tools for working with disk images maintained under the libguestfs project. The general goal is to use such tools to do the inspection and apply the necessary transformations, and then present the target filesystems in a format that Velociraptor can work with. This might be in the form of a block device containing an NTFS partition, or more commonly by mounting the target filesystem on a directory and thereby providing Velociraptor with transparent access to the underlying image/filesystem.
Creating a remapping config
There are several general paths you can take to create a remapping config. Most often we have to deal with images of Windows systems, so there is a slight bias towards Windows disk images being easier to deal with because they tend to conform to a more standardized layout pattern. Linux is trickier to work with due to the much larger variety of filesystems, partition management schemes (often LVM, which we don’t currently support), and complex partitioning.
In the examples below we’ve illustrated the remapping generation using the
deaddisk CLI command, but since it uses the Generic.Utils.DeadDiskRemapping
artifact internally, it is equivalent to running that artifact via the GUI.
-
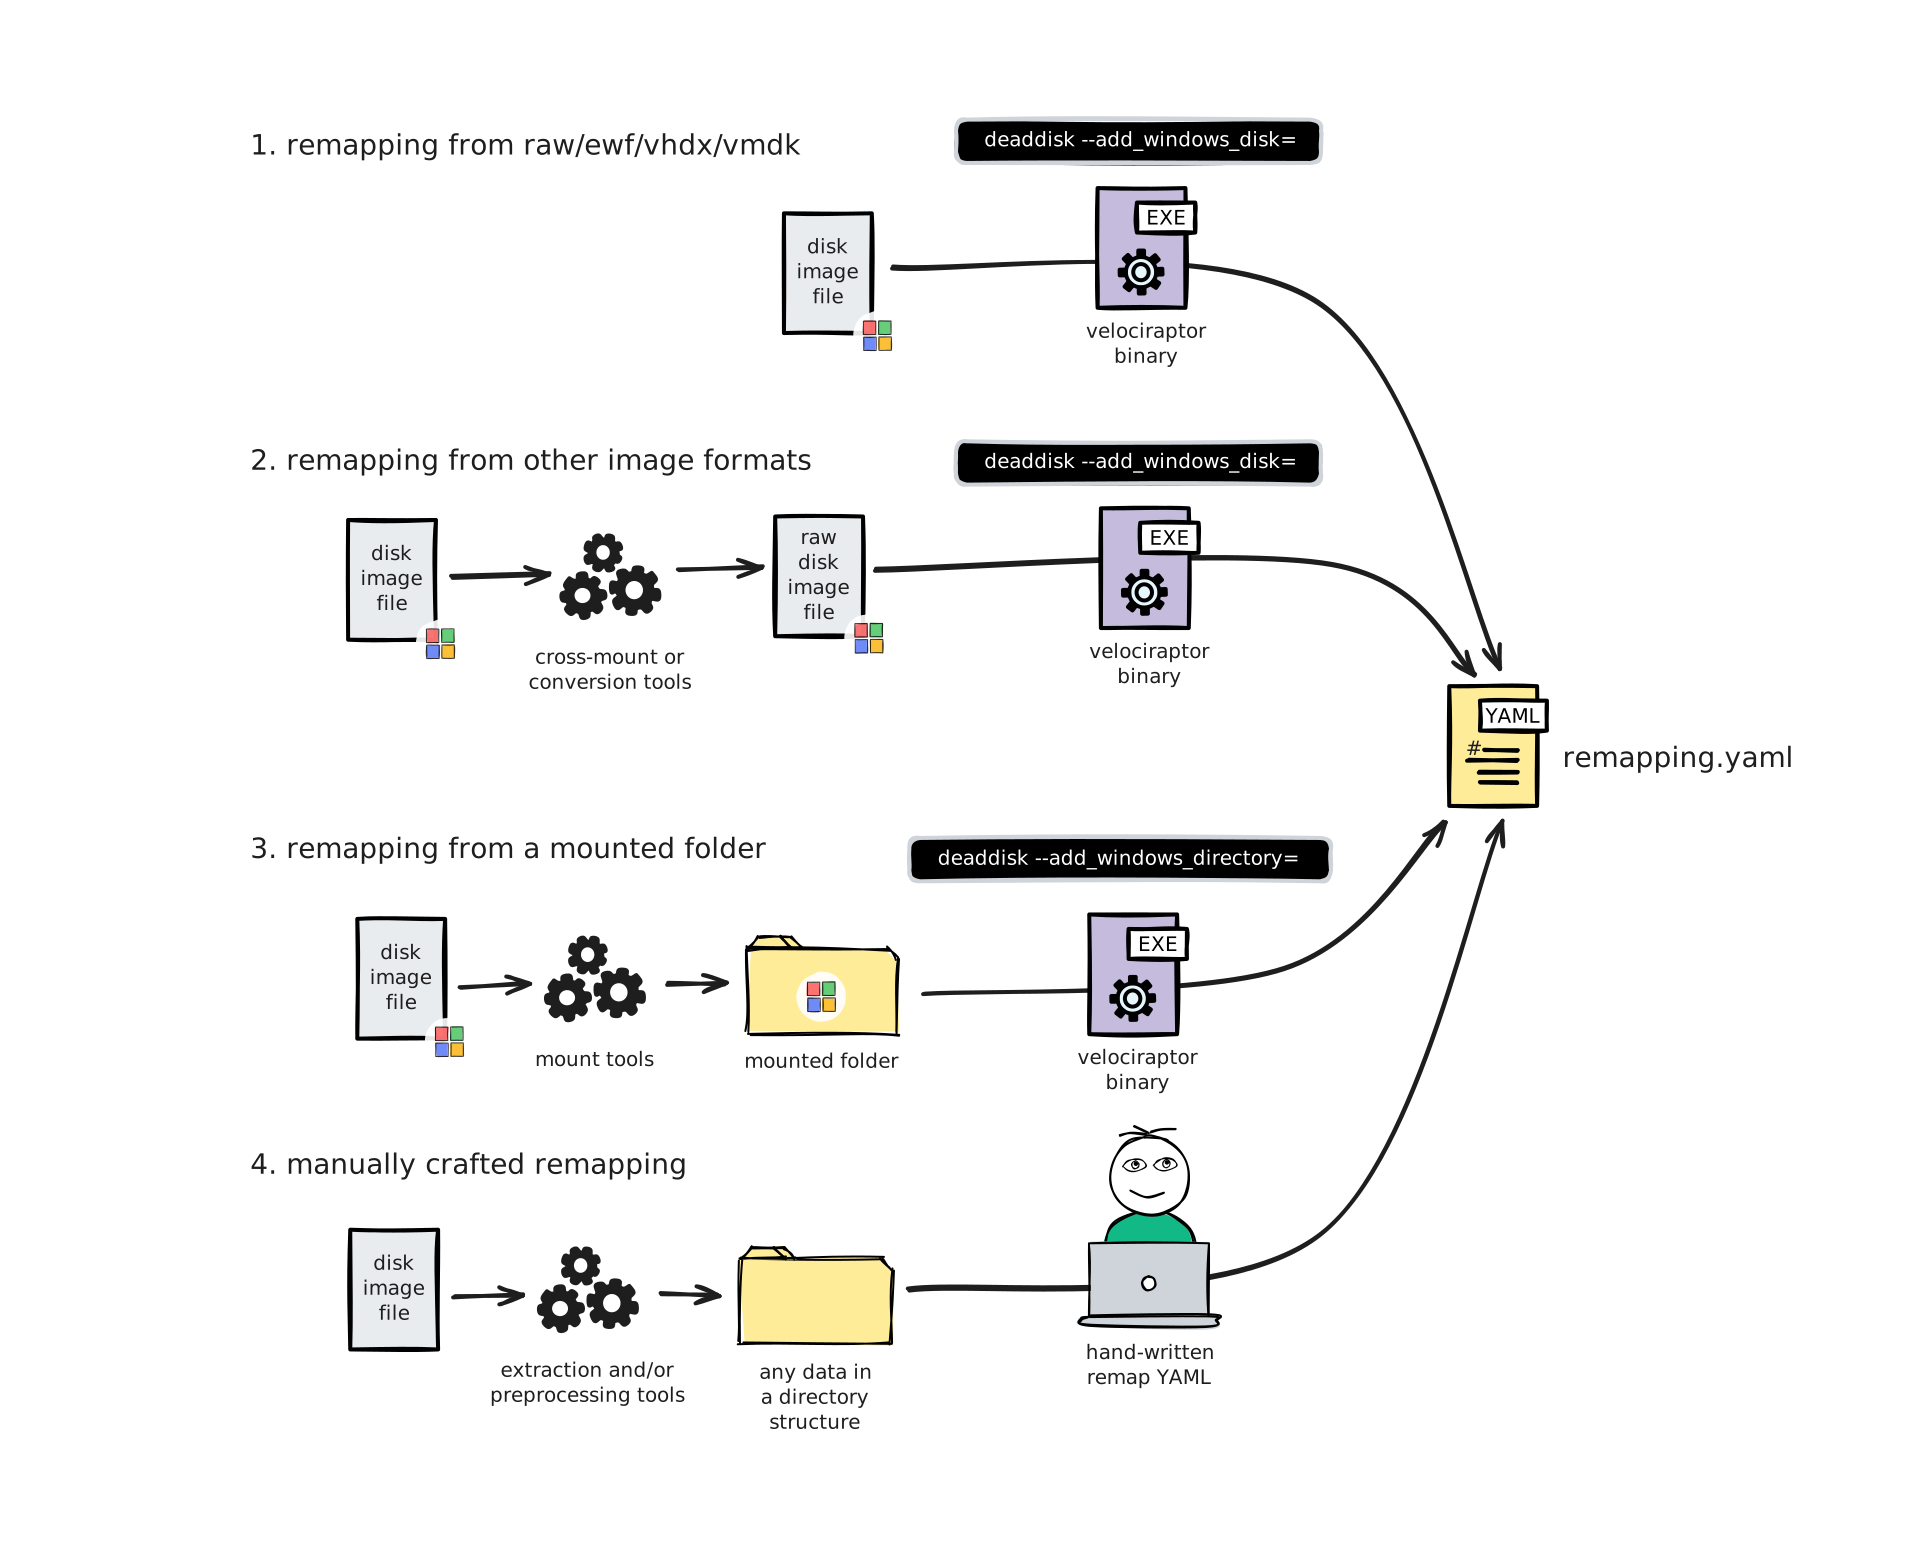
Remapping from RAW/EWF/VHDX/VMDK image
In the simplest case, you have a disk image of a Windows system in one of the supported image formats.
The process is straightforward: You run the command
velociraptor deaddisk --add-windows_disk=...or theGeneric.Utils.DeadDiskRemappingartifact, specifying the relevant input file. This will produce the remapping config, which will be stored in the collection’s Uploaded Files for the artifact, or output to a file is using the CLI. -
Remapping from other image formats
If you have a disk image of a Windows system and it’s not in one of the supported image formats, then you can cross-mount of convert the image to one of the supported formats. Then proceed as in the previous scenario.
-
Remapping from a mounted folder
If you have a disk image of a Windows system in any image formats, but the filesystems are protected (for example, by BitLocker) or not natively supported by Velociraptor, then you can use external tools such as those provided by
libguestfsto first unlock the partitions and mount them to a directory. You can then use the commandvelociraptor deaddisk --add-windows_directory=...or theGeneric.Utils.DeadDiskRemappingartifact to inspect the image and create the remapping config. -
Manually crafted remapping
For advanced use cases you might have to manually craft an appropriate remapping config, although you can generate one for a simple disk image and then use that as a reference/starting point. To help you do this you could use Velociraptor (for example, the artifact
Windows.Forensics.PartitionTablemay provide useful info, or you can use similar VQL queries to inspect the image contents), or external tools (for example from the libguestfs project).
Non-Windows disk images
For other operating systems, Velociraptor does not currently have built-in artifacts to generate the remapping, although we do have native accessors for EXT4 and FAT filesystems. So if you are manually crafting a remapping then you could consider using those accessors.
However the simplest option is usually to rely on an external tool (such as
guestmount, as mentioned above) to mount the target filesystem as a directory
so that Velociraptor can access it.
Auto-generating the remapping config (Windows only)
The following process will work in most simple cases - namely a disk or
partition image of a Windows system, where we assume the partition containing a
folder named Windows is the C: drive.
-
In the Velociraptor GUI, navigate to
Server Artifactsin the sidebar menu. -
Create a new collection by clicking the
New Collectionbutton. -
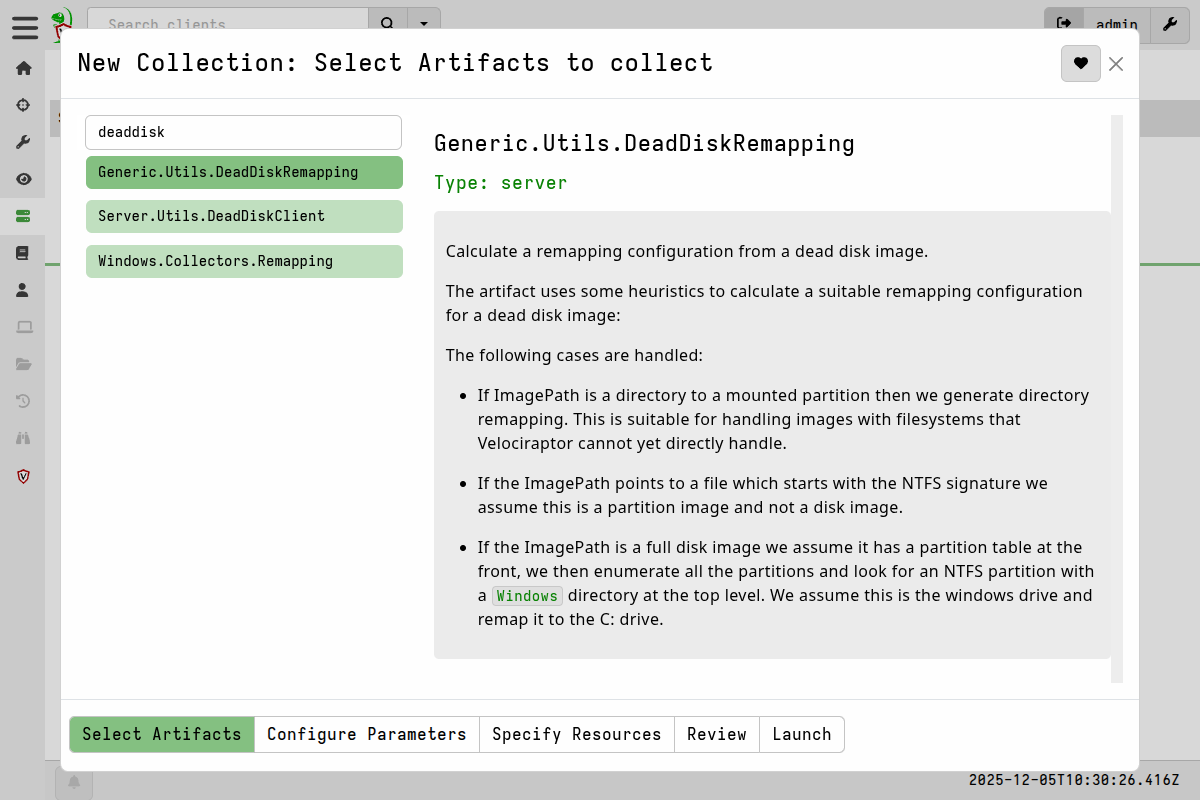
Select the
Generic.Utils.DeadDiskRemappingartifact:Select Artifact -
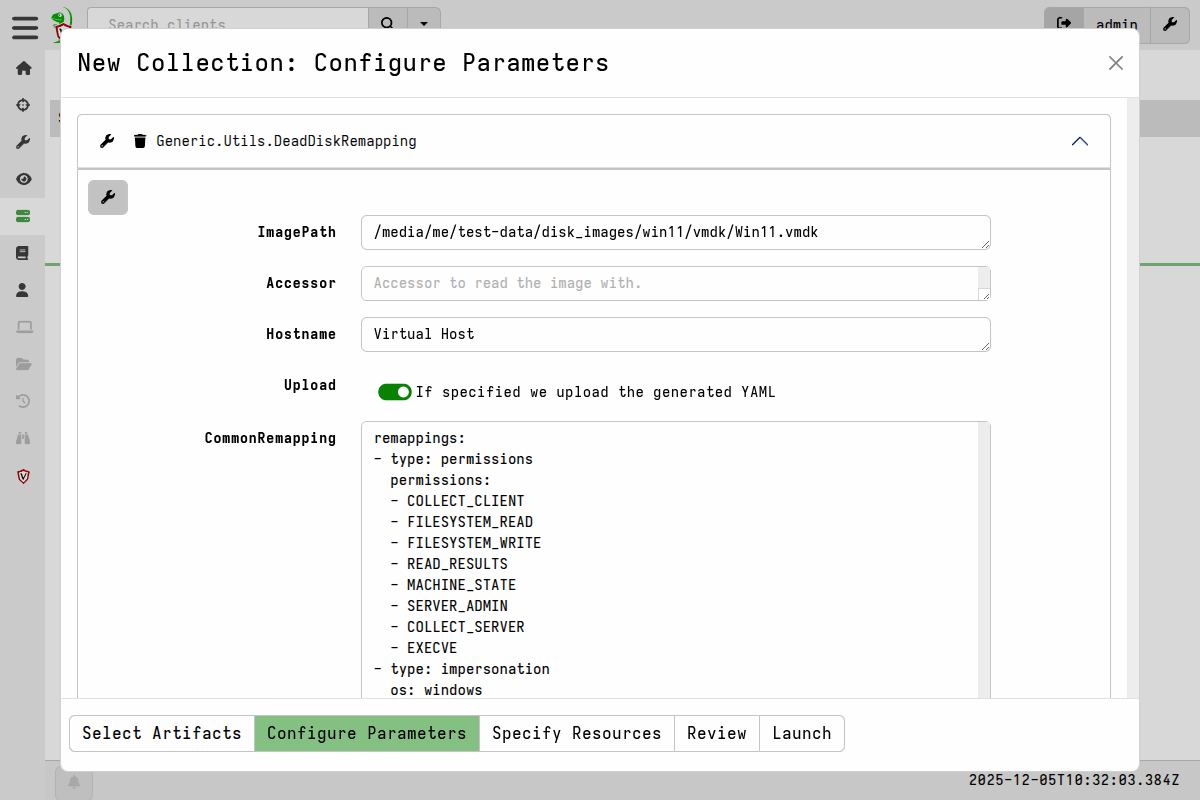
In the artifact parameters we configure the path to the image, and provide a
Hostnamethat the virtual client will identify itself as.Configure Artifact Parameters -
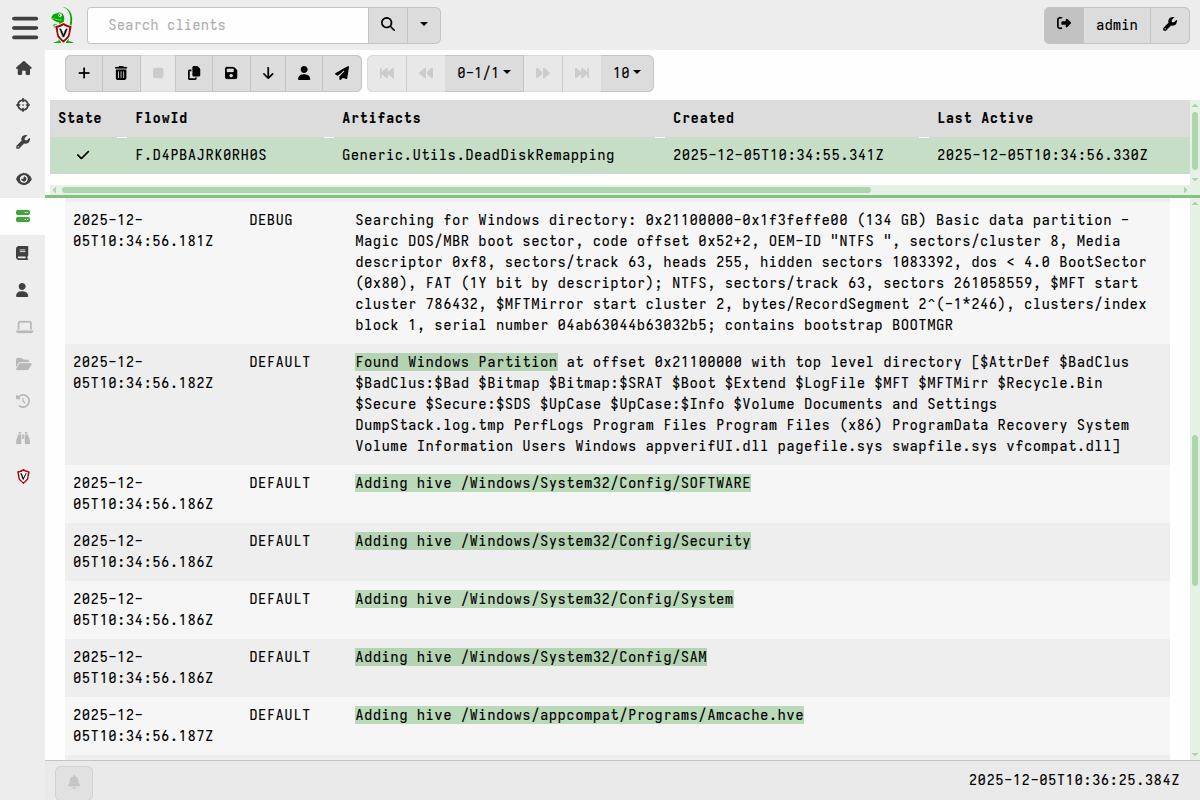
After launching the artifact, you can inspect the query log to see how the artifact automatically inspects each partition to detect the remapping configuration.
View Artifact Logs -
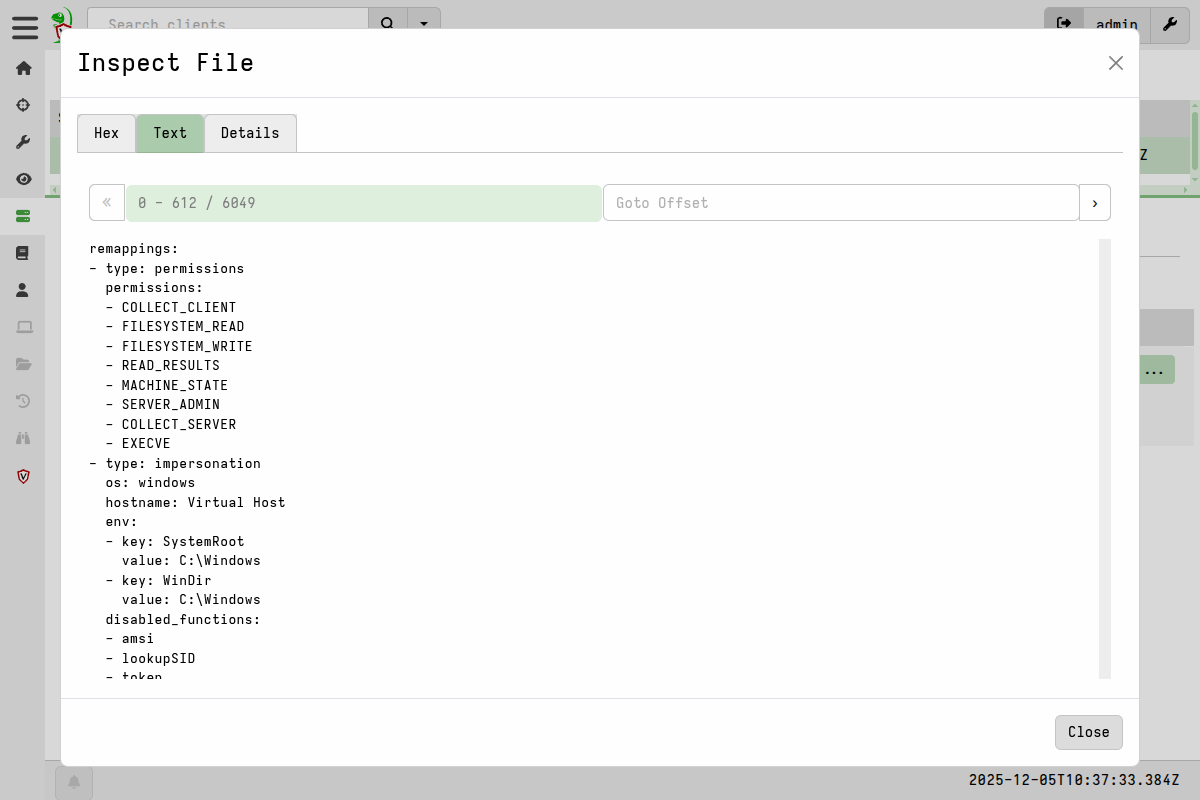
If successful, the collection’s File Uploads tab will now contain the YAML remapping config.
You can inspect it in the GUI:
Inspect the remapping And then download the remapping so that you can use it with a virtual client.
Download the remapping
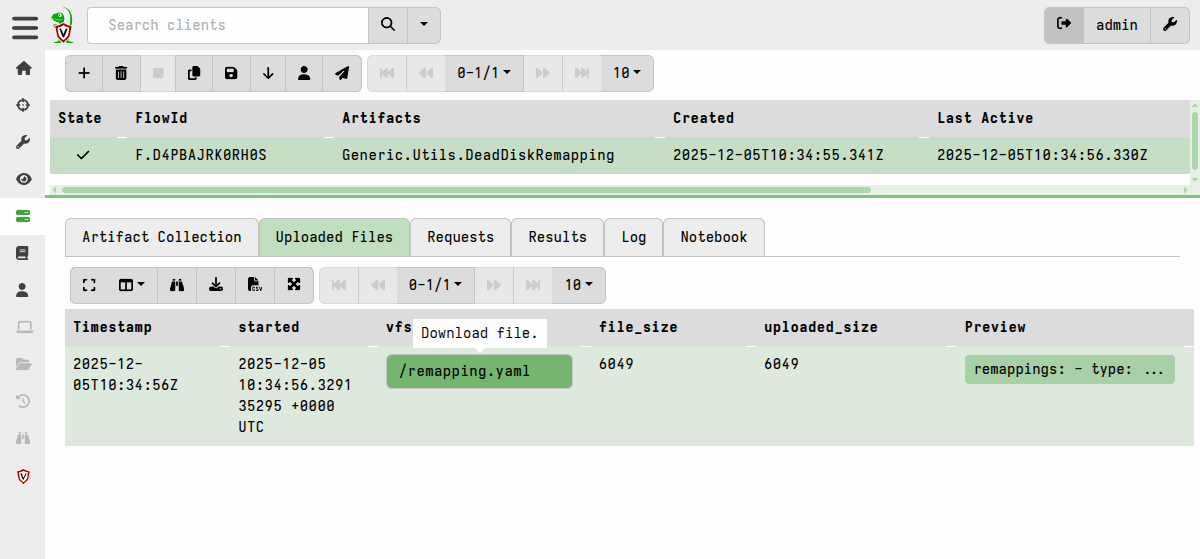
As mentioned previously, the remapping generation step can also be done using
the CLI’s deaddisk command, which runs the
same Generic.Utils.DeadDiskRemapping artifact.
Running a virtual client that uses the remapping
The remapping config contains static path information
You should ensure that the disk image file or mount point has the exact same path when running the client as it had when you created the remapping config, since the remapping config contains this path.
So if you move the image file or use a different mount point after generating the remapping then the remapping will not work!
If you want to run the client on a separate system that is fine, as long as you replicate the path to the image / mount point on the client system.
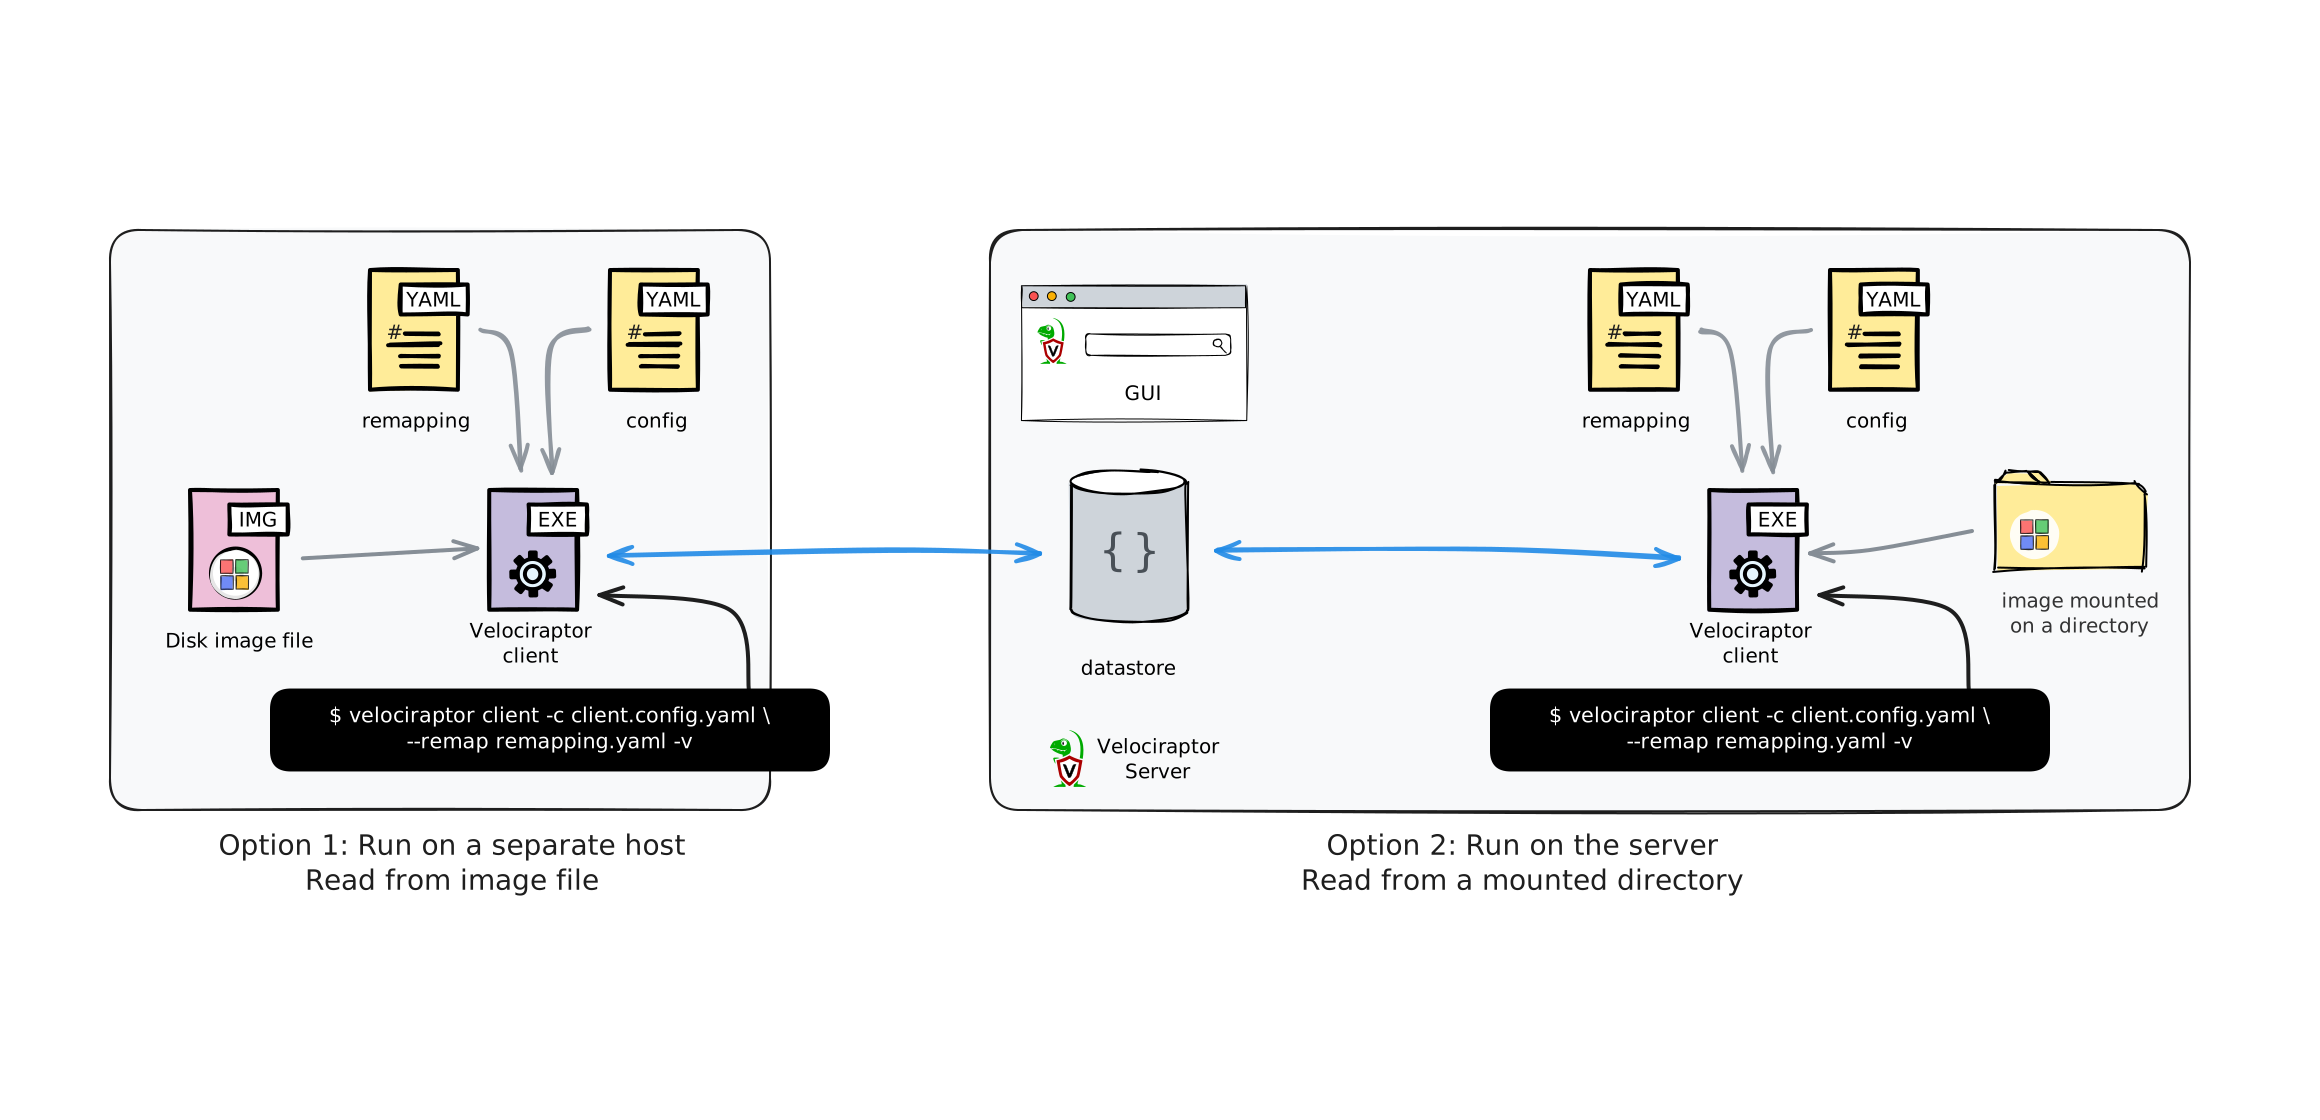
Running the virtual client is basically the same as
running a client interactively.
The only difference is that we now provide it with the remapping config using
the --remap flag.
-
We launch the client with the remapping:
./velociraptor --config client.config.yaml client --remap remapping.yaml -vThe
client.config.yamlis the normal client config that you can download from your server’s Dashboard screen.
Note
Since the client will generate a writeback file on disk that contains it’s
unique client ID. This writeback file will persist and cause the client to
retain the same client ID between runs. If you intend to process further
images on the same host then you will either need to delete the writeback
file before starting a new client, or else add the path to a new writeback
file for these subsequent clients. For the latter option, this can be done by
adding the path to a new writeback file to the above command line using the
appropriate --config.client-writeback-<platform> flag - for example,
--config.client-writeback-linux=/path/to/writeback.yaml for Linux or
--config.client-writeback-windows="C:/path/to/writeback.yaml" for Windows.
-
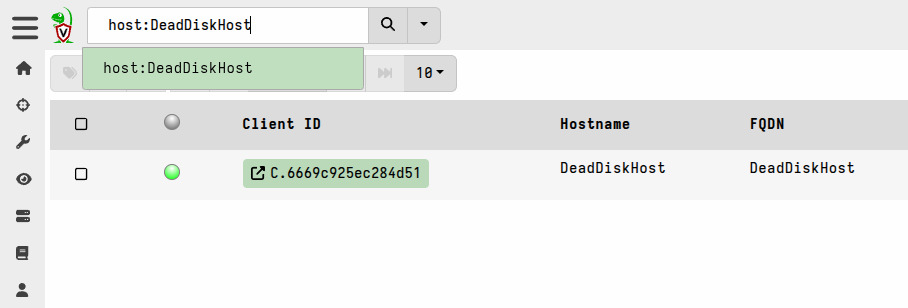
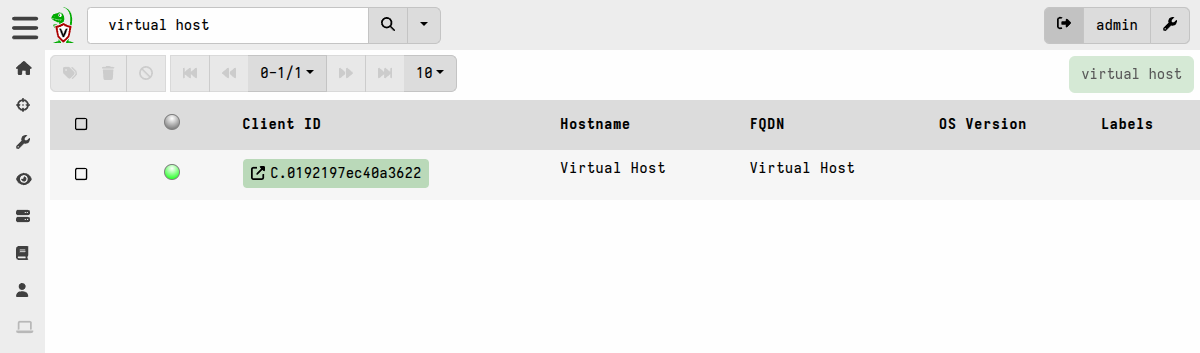
If you search clients for the hostname you should see that the client is now connected to the server:
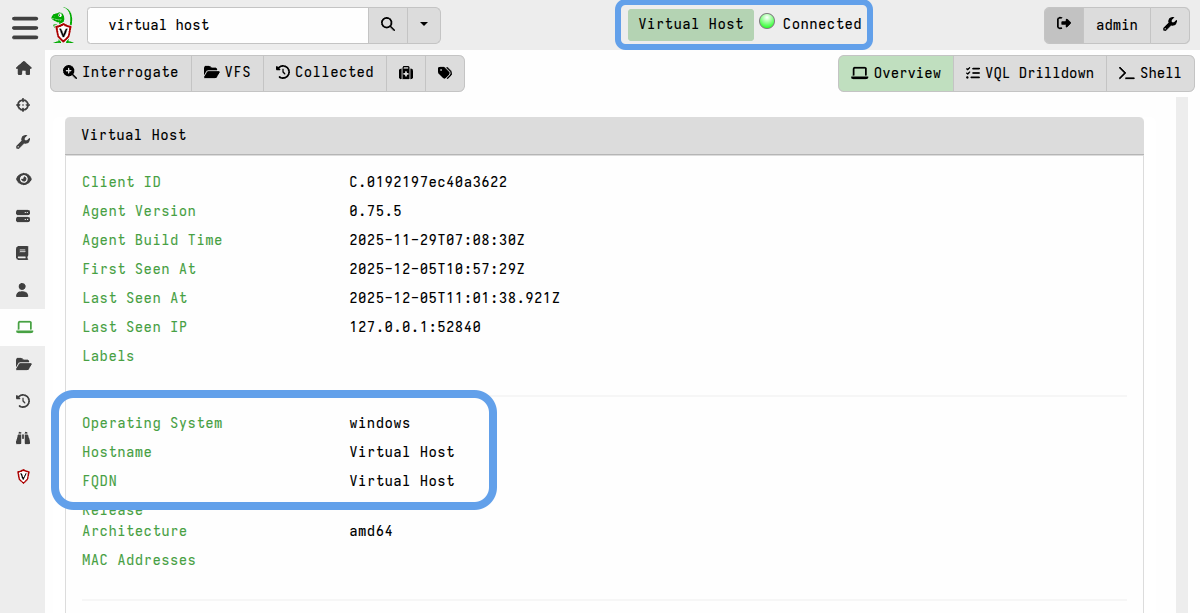
Client enrolled and connected On the client’s Overview screen you will see that the impersonated information is applied (in this case the client is actually running on the server under Linux).
Client info -
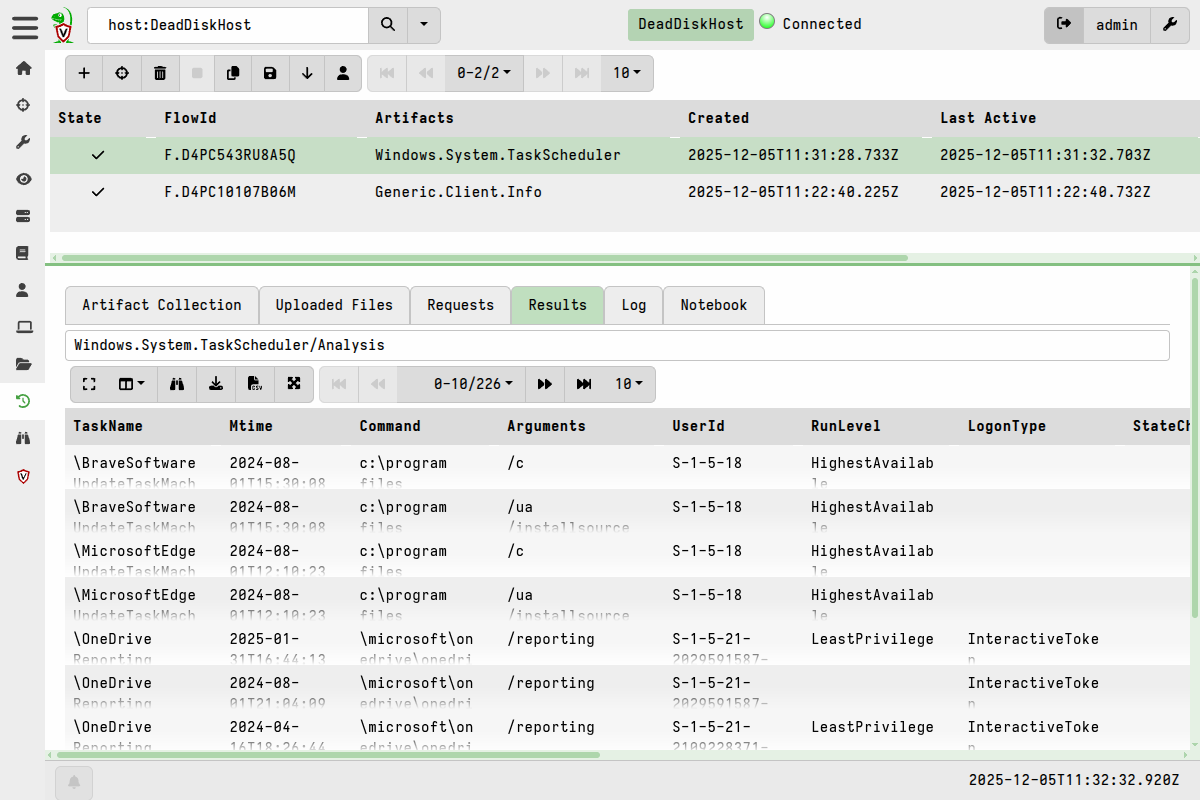
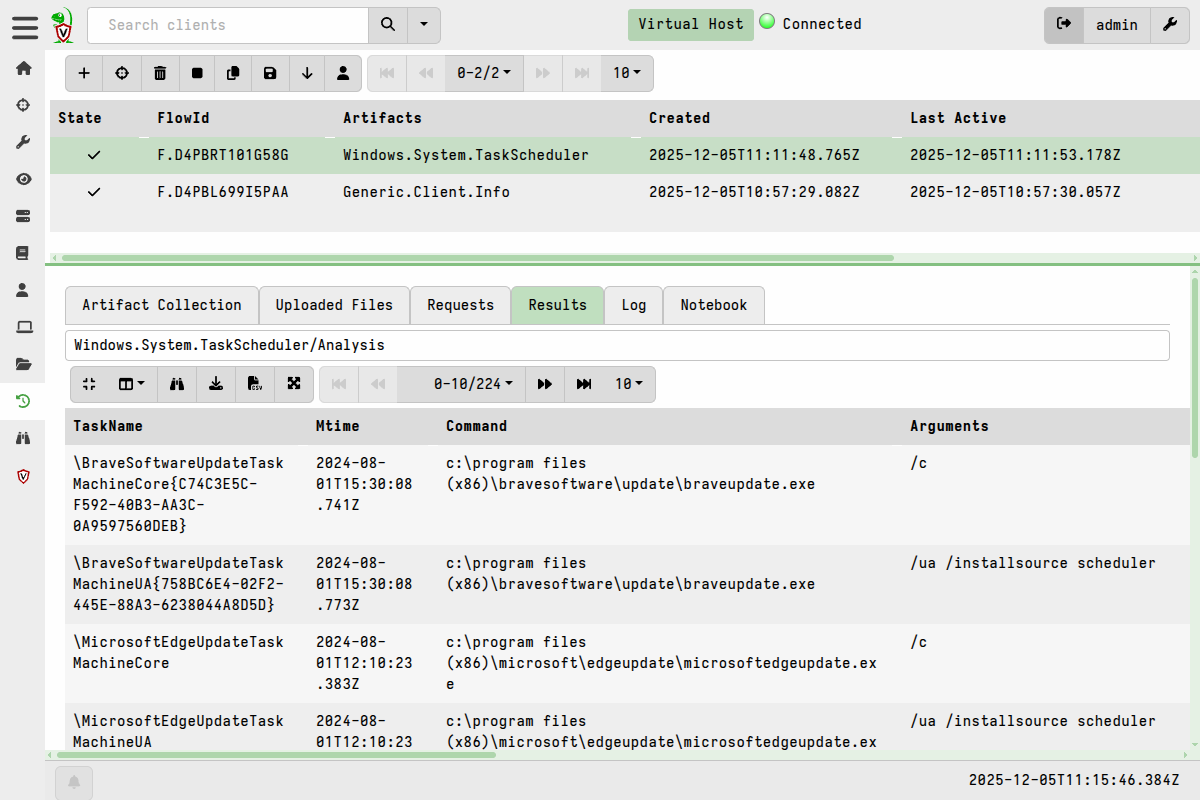
You can now collect any artifacts that primarily read from the disk.
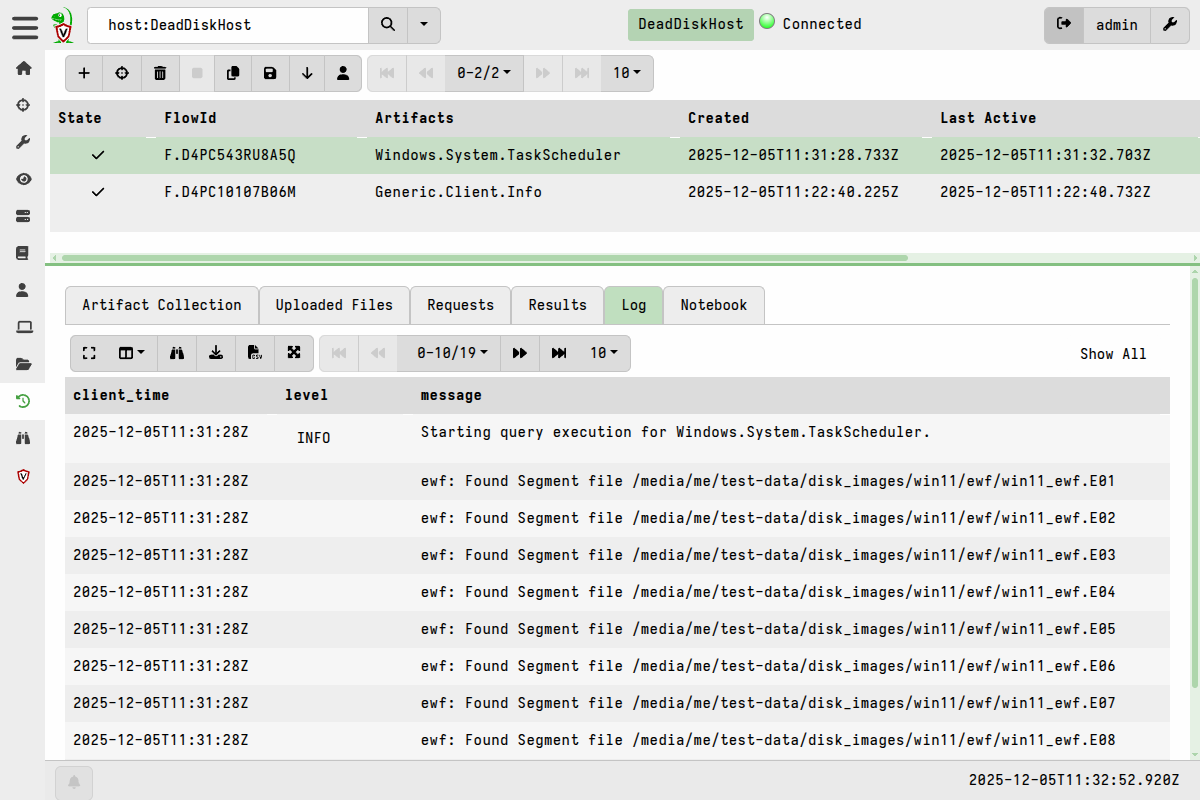
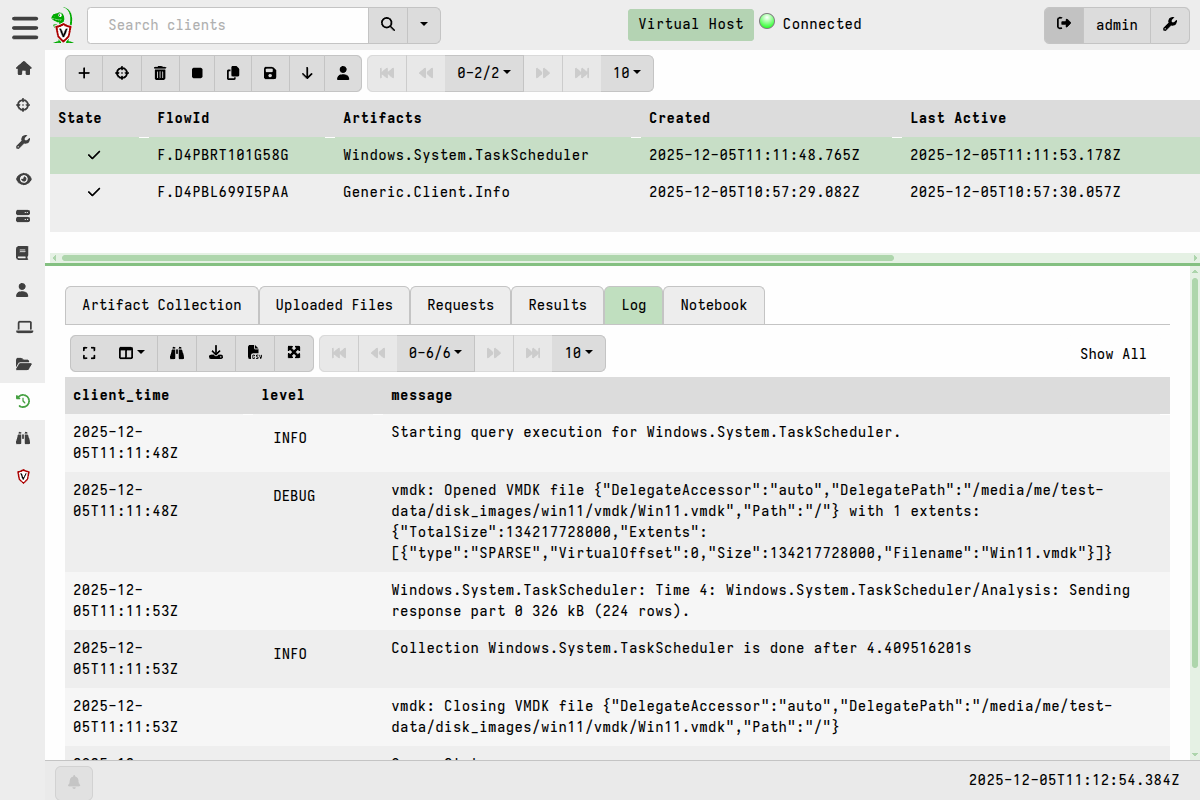
Collecting artifacts from the virtual client The query log from every collection will indicate that the data comes from the image file, but in the results it will appear as if the queries ran on the original endpoint.
Artifact collection logs
Automating the process in a single server artifact
If your disk image is located on the server, you can generate the remapping
config and launch the virtual client in a one step, using the
Server.Utils.DeadDiskClient artifact. This artifact runs the client using the
VQL execve() plugin after generating the remapping config.
The following process will work in most simple cases - namely a disk or
partition image of a Windows system, where we assume the partition containing a
folder named Windows is the C: drive.
-
In the Velociraptor GUI, navigate to
Server Artifactsin the sidebar menu. -
Create a new collection by clicking the
New Collectionbutton. -
Select the
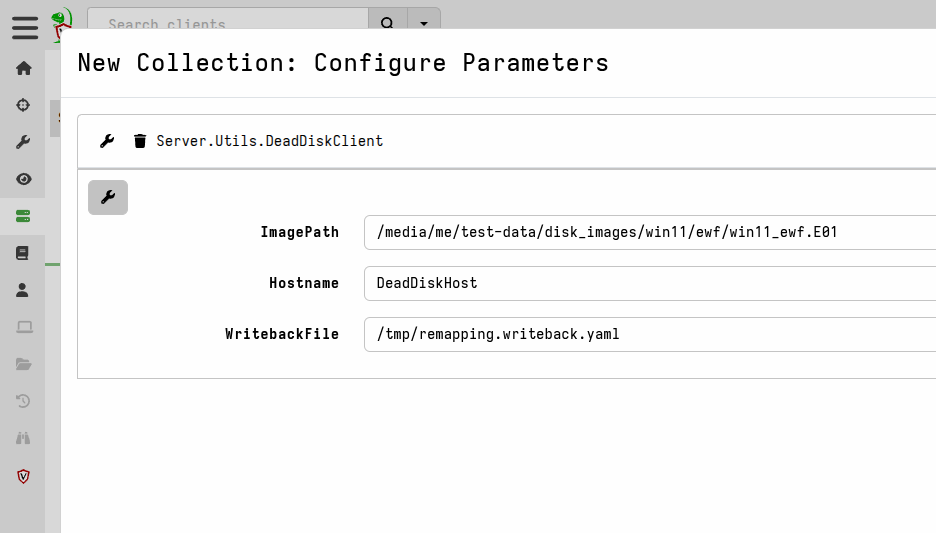
Server.Utils.DeadDiskClientartifact and configure the path to the image in the artifact parameters.Artifact Parameters The
Hostnameparameter controls what the virtual client will identify as. TheWritebackFileparameter will store the writeback of the virtual client so you can reuse it next time to keep the same client id. -
In the
Resourcestab you can update theMax Execution timewhich controls how long the virtual client will be alive. By default this is 1 hour. -
After launching the artifact, you can inspect the query log to see how the artifact automatically inspects each partition to detect the remapping configuration.
Artifact Logs
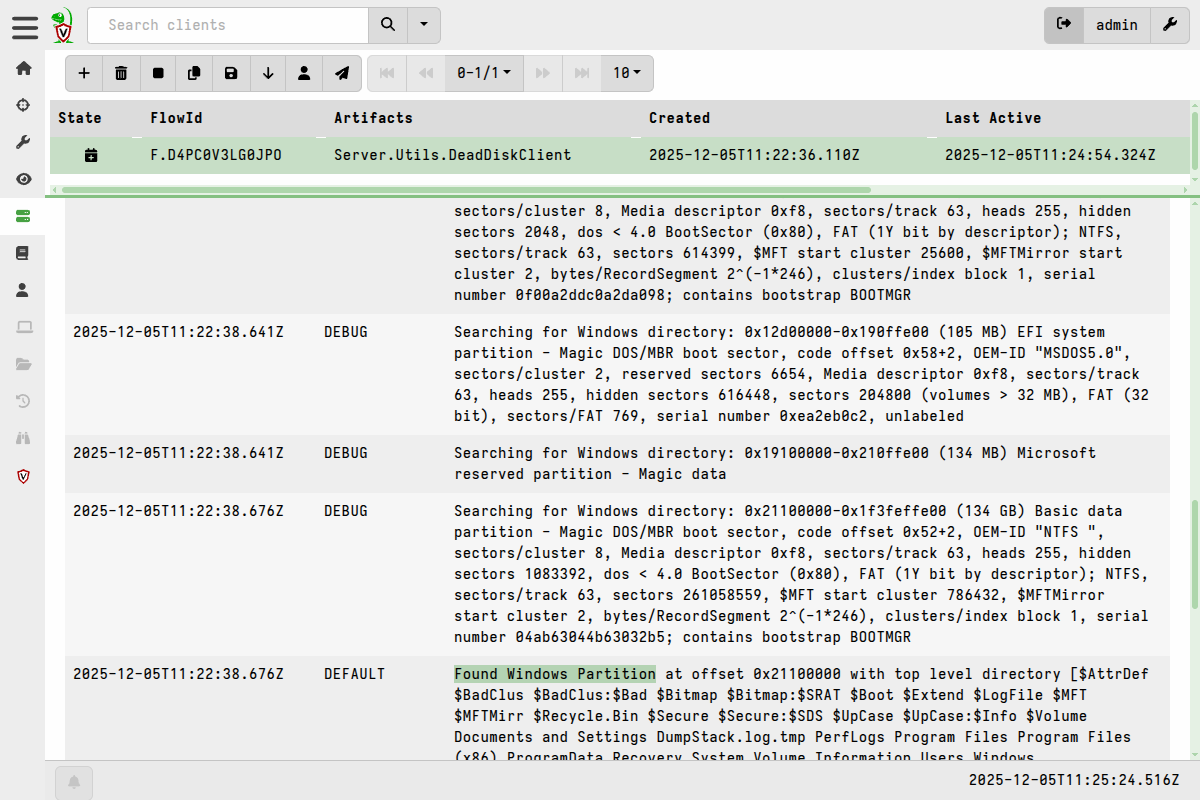
Although it appears that the collection is not complete, it is actually running a client with the remapping in a separate process, so it will wait for the timeout before the client is torn down. During this time you can interact with the client, collect any artifacts, or have it participate in any hunts.
-
Search for the hostname to find the new client id.
Search for the new virtual client -
You can now collect any artifacts that primarily read from the disk.
Collecting artifacts from the virtual client -
The query log from every collection will indicate that the data comes from the image file, but in the results it will appear as if the queries ran on the original endpoint.
Artifact collection logs -
To end the virtual client session you can either wait for it to time out, or navigate back to the
Server.Utils.DeadDiskClientcollection and cancel it.