How do I setup Velociraptor with a CloudFlare Tunnel?
For this tutorial I have built Velociraptor on an Ubuntu 20.04 machine.
Step 1
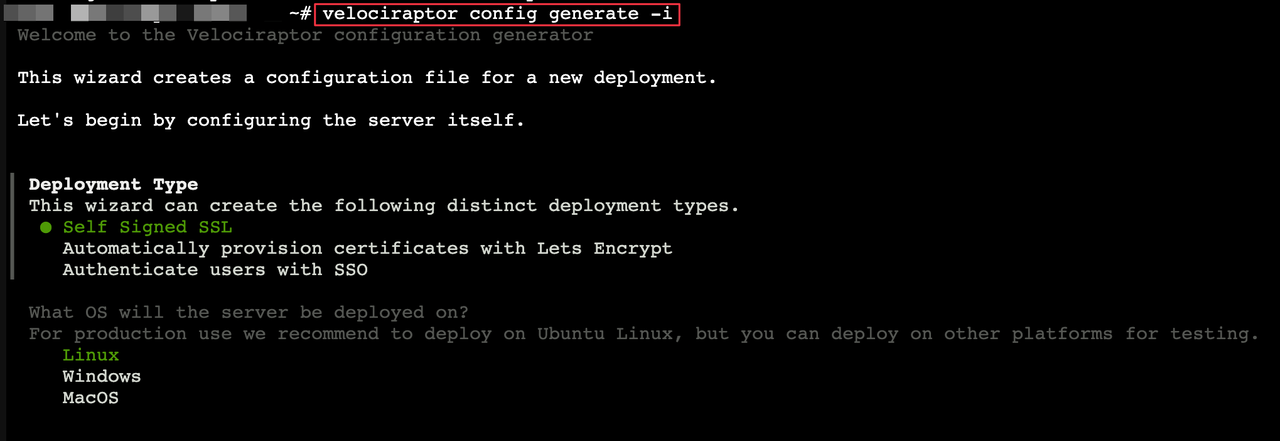
Once you have Velociraptor installed, the first thing to do is to Generate a config file:
velociraptor config generate -i
Step 2
Follow the following steps:
- Deployment Type: Self Signed SSL
- What OS will the server be deployed on: Linux
- Path to Datastore: /var/tmp/velociraptor
- Path to the logs directory: /var/log/velociraptor
- Internal PKI Certificate: 2 Years
- Do you want to restrict VQL functionality on the server?: No
- Use registry for client writeback?: No
- What is the public DNS name of the Master Frontend: domain.com
- DNS Type: None : Configure DNS Manually
- Would you like to try the new experimental websocket comms?: No
- Enter the frontend port to listen on.: 443
- Enter the port for the GUI to listen on.: 443
- Overwrite File: /etc/velociraptor/server.config.yaml
Step 3
Replace all the localhost IPs to listen on all interfaces (0.0.0.0)
sed -e '/bind_address:/{s/127.0.0.1/0.0.0.0/}' -i /etc/velociraptor/server.config.yaml
Step 4
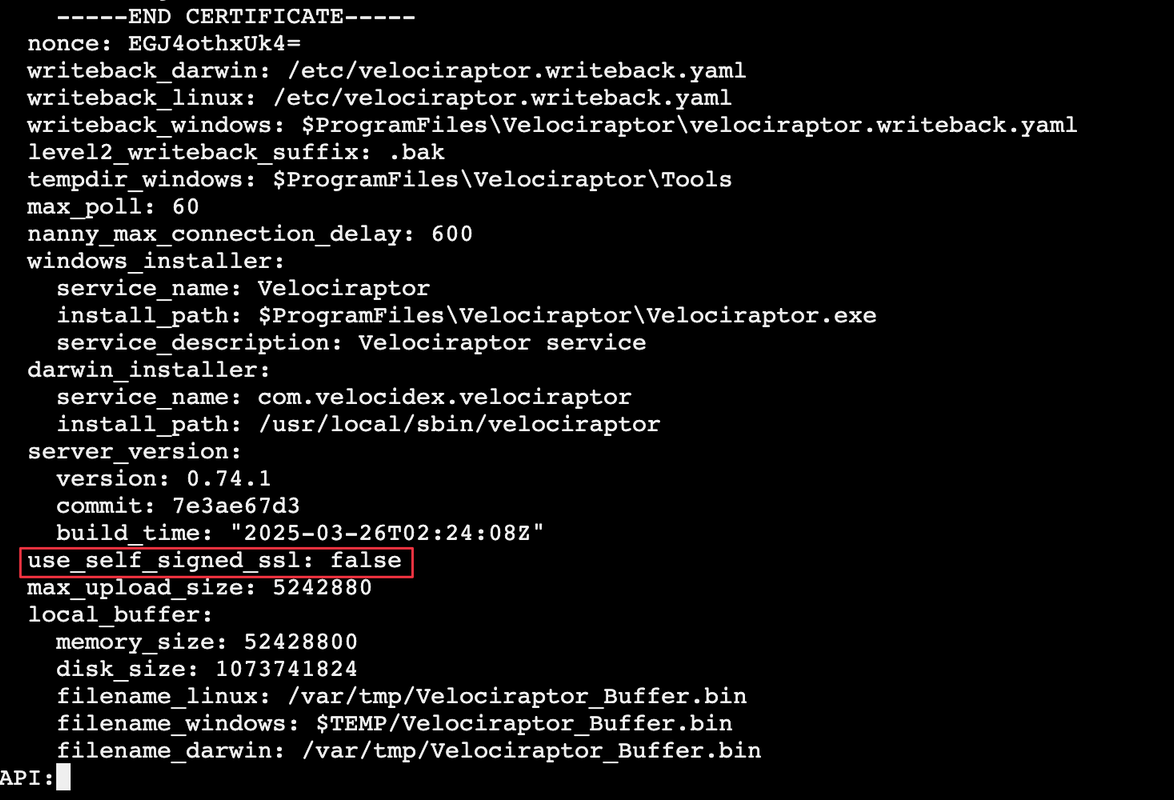
As CloudFlare is handling the certificate you need to disable the self signed certificate in the yaml file
nano /etc/velociraptor/server.config.yaml
Step 5
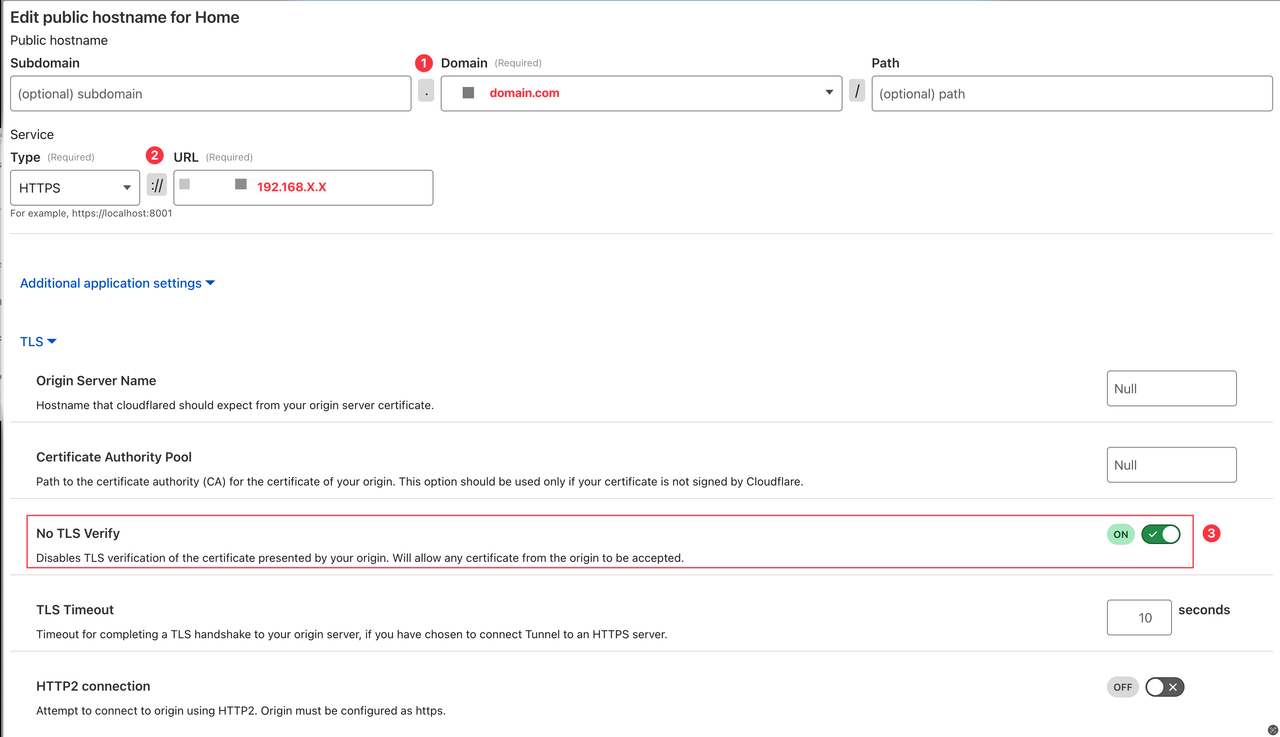
In the CloudFlare Dashboard make a new public hostname pointing to your internal IP address. The setting is under Zero Trust > Networks > Tunnels > Your Tunnel Name
Step 6
Start your Velociraptor
velociraptor -c /etc/velociraptor/server.config.yaml frontend -v