Hunting
With Velociraptor, you can collect the same artifact from multiple endpoints at the same time using a Hunt.
Hunts allow you to do the following:
-
Monitor offline endpoints by scheduling hunts collecting artifacts from any endpoints that come back online during a certain period.
-
Examine the results from all collections easily.
-
Keep track of which endpoints collected the artifact and make sure the same artifact is not collected more than once on any endpoint.
What is a hunt?
A hunt is a logical collection of a one or more artifacts from a group of systems. The Hunt Manager is a Velociraptor component that is responsible for scheduling collections of clients that met certain criteria, then keep track of these collections inside the hunt.
The important takeaway from this is that artifacts are still collected from endpoints the same way as we did previously, it is simply automated using the hunt manager.
Schedule a new hunt
To schedule a new hunt, select the Hunt Manager from the sidebar and then select New Hunt button to see the New Hunt Wizard.
Provide the hunt with a description and set the expiration date (by default hunts expire after 1 week). You can also target machines containing the same label (a Label Group), or exclude the hunt from these machines using a label.

The total number of clients in any real network is not known in advance because new clients can appear at any time as new hosts get provisioned, or old hosts return after being powered off for some time (for example overnight).
Therefore it does not make sense to think of a hunt as ever being “complete” or “done”. As new clients are discovered, as long as they meet the hunt criteria, and as long as the hunt is still active, the hunt is applied to them.
It is only when the hunt expires that new clients are no longer assigned to the hunt. Note that each client can only receive the hunt once.
Next you need to select and configure the artifacts as before. Once everything is set, click Launch Hunt to create a new hunt.
Hunts are, by default, created in the Paused state so you will need to click
the Start button to activate a selected hunt. Once a hunt is started all
applicable clients will begin collecting the assigned artifact, so be sure to
test your artifact selection on one or two endpoints first before applying it
broadly via a hunt.

You can monitor the hunt’s progress. As clients are scheduled they will begin their collection. After a while the results are sent back and the clients complete.

Post-processing hunt results
After collecting an artifact from many hosts in a hunt, we often need to post-process the results to identify the results that are important.
Velociraptor creates a notebook for each hunt where you can apply a VQL query to the results.
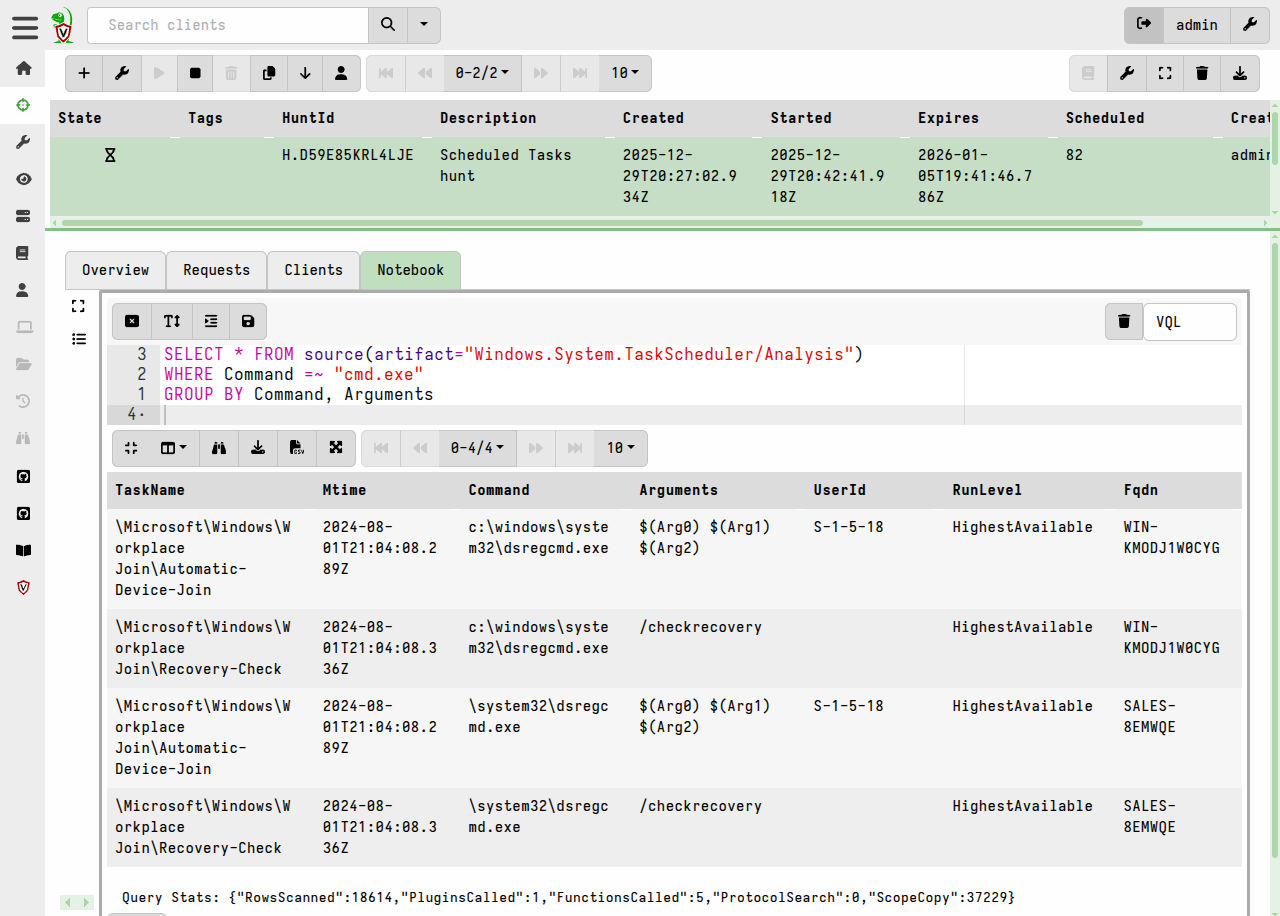
Let’s consider our earlier example collecting the scheduled tasks from all endpoints. Suppose we wanted to only see those machines with a scheduled task that runs a batch script from cmd.exe and count only unique occurrences of this command.
We can update the notebook’s VQL with a WHERE clause and GROUP BY
to post-process the results.
When hunting large numbers of endpoints, the collected data can grow quickly. Even uploading a moderately sized file from many endpoints can add up very quickly. For example, collecting a 100Mb file from 10,000 machines results in over 1Tb of required storage!
Be mindful of how much data you will be uploading in total. It is always best to use more targeted artifacts that return a few rows per endpoint rather than fetch raw files that need to be parsed offline.
Hunts and labels
We have seen above that we can target hunts by labels. When a hunt is targeted to a label, only hosts that have the label assigned will be automatically scheduled by the hunt manager.
This allows you to dynamically apply the hunt to various hosts by simply adding labels to them. This workflow is very powerful as it allows for incremental triaging.
Lets consider an example of how this can be applied in practice.
We start the process by setting up a hunt for preserving the event logs from clients which we consider to have been compromised. Since this hunt will collect a lot of data, we don’t want it to run on all endpoints - instead we will be very selective and only schedule it on compromised hosts, to which we’ll apply a label.
-
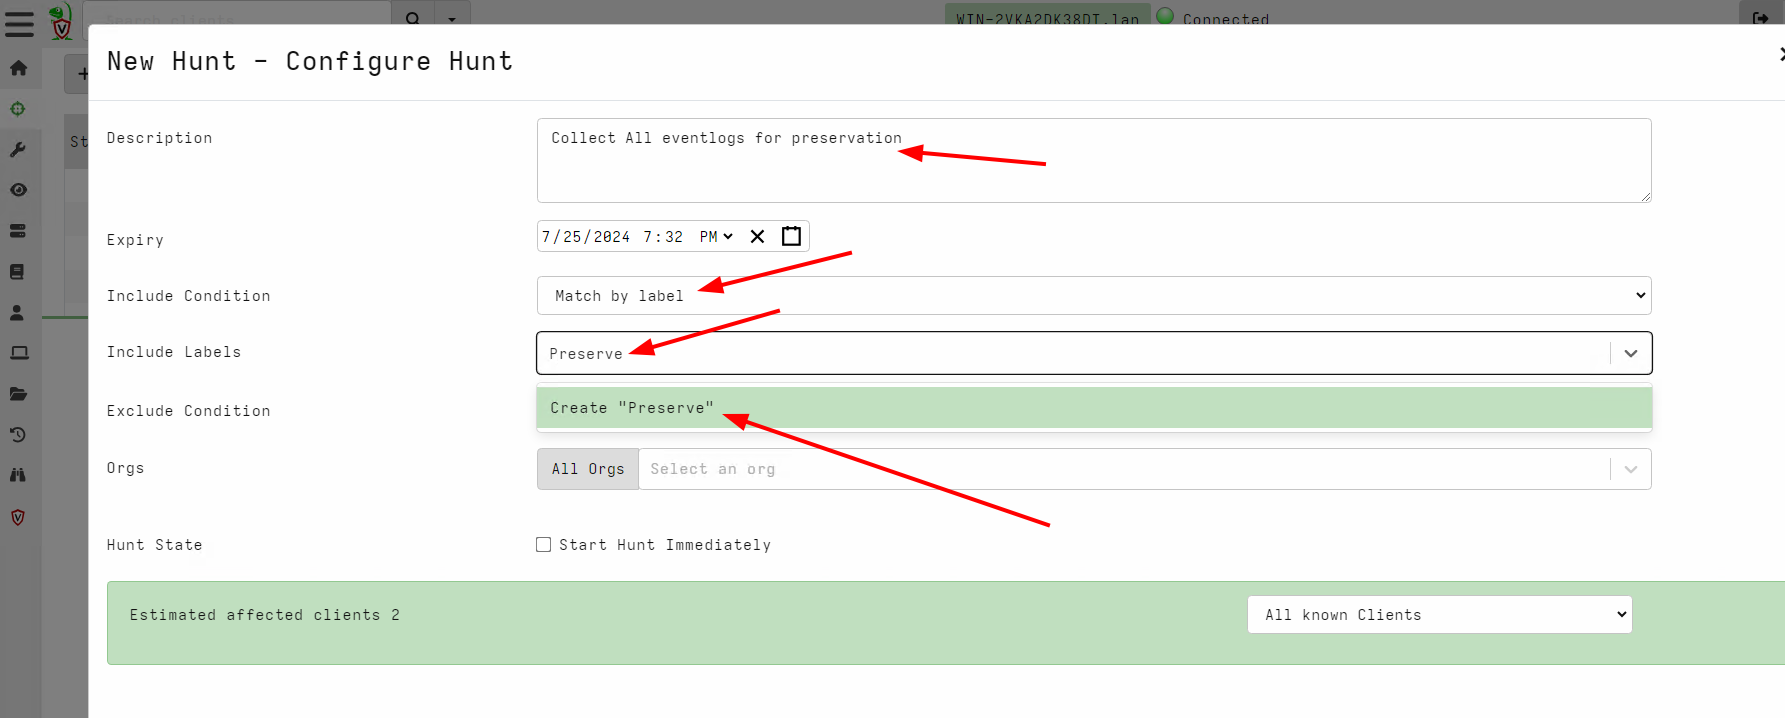
Add a description for this hunt.
-
Select to “Match by Label”.
-
Search for an existing label, or if the label we want to use doesn’t already exist then we can create a new label. In this case we’ll choose to create the new label
Preserveto denote hosts that we want to preserve the event log files from.
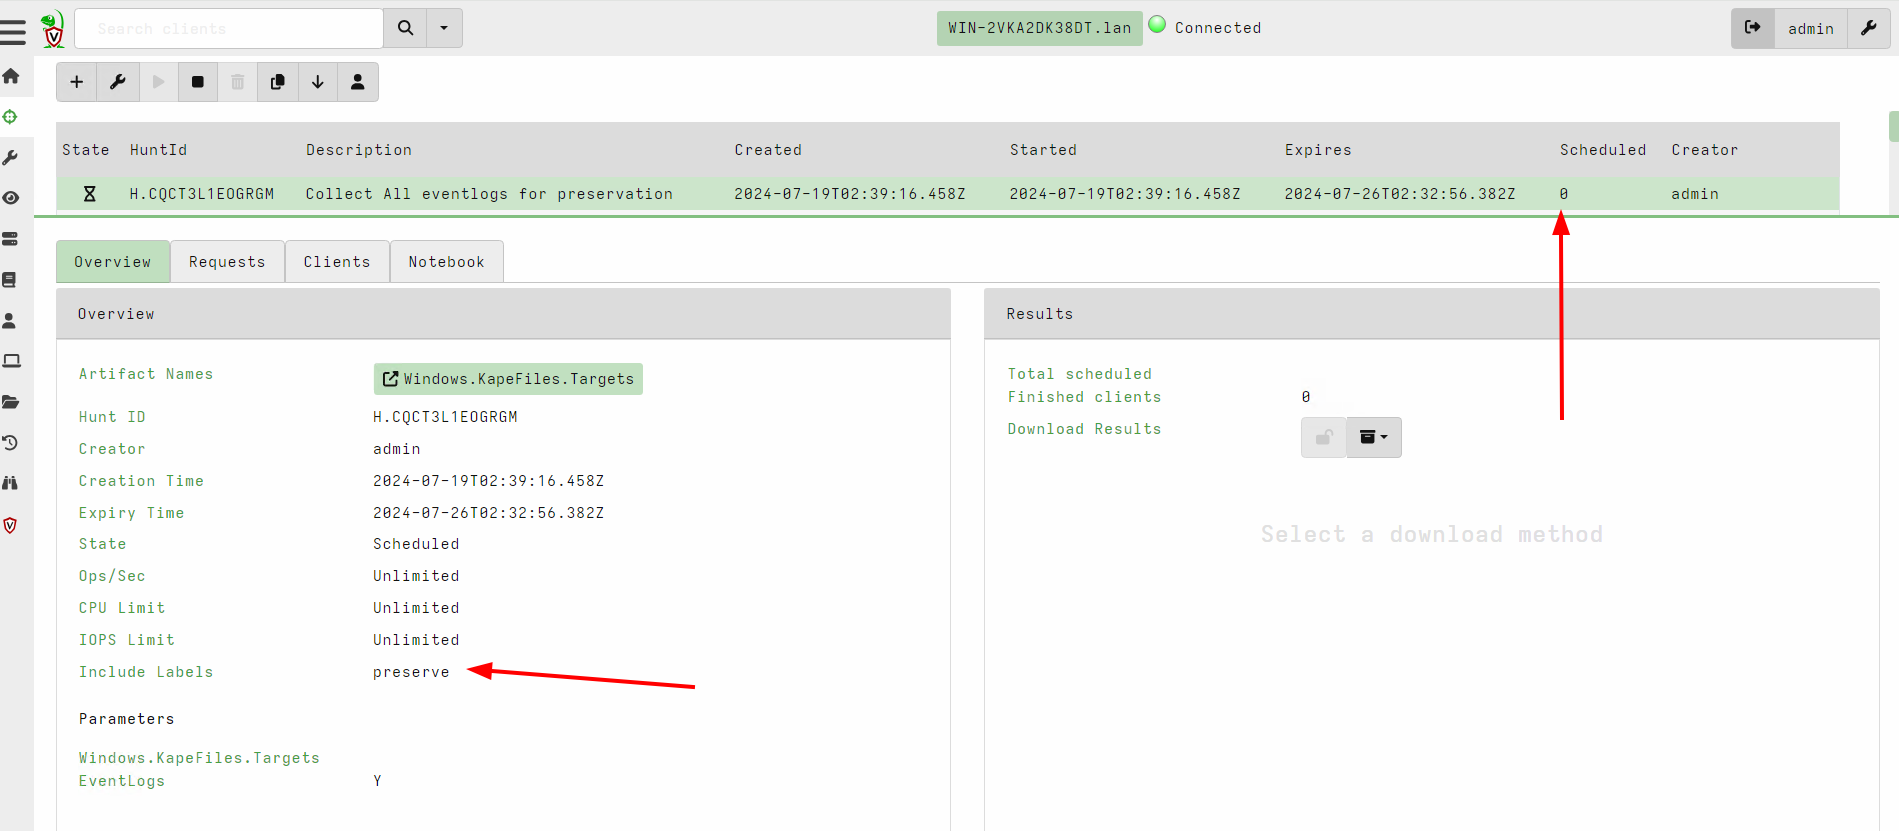
For this example, we can use the Windows.Triage.Targets artifact with the
Eventlogs target. This will collect all windows event log files for
preservation purposes.

The hunt is started but since there are no clients with the new label yet, no clients are scheduled.
Now as we continue with the investigation, if at some point we find a client
which we believe is compromised then we simply go to the host overview page
and label this client with the Preserve label.
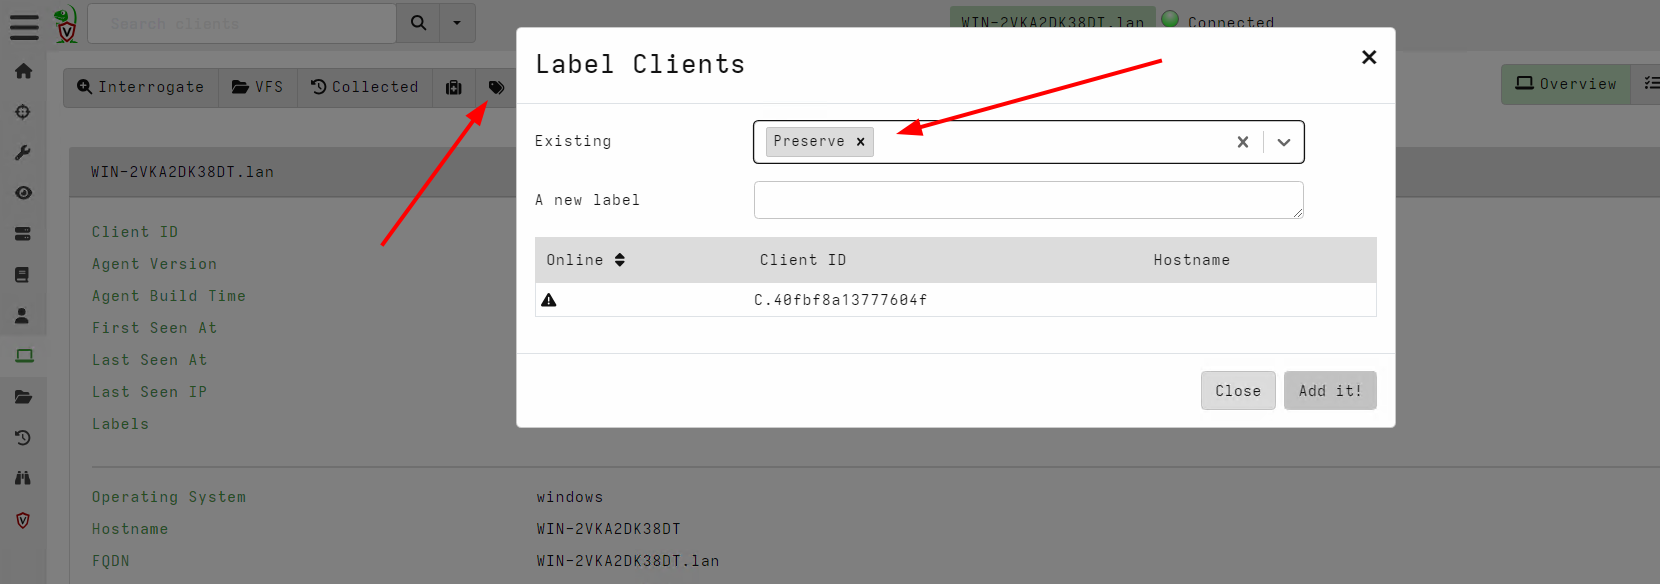
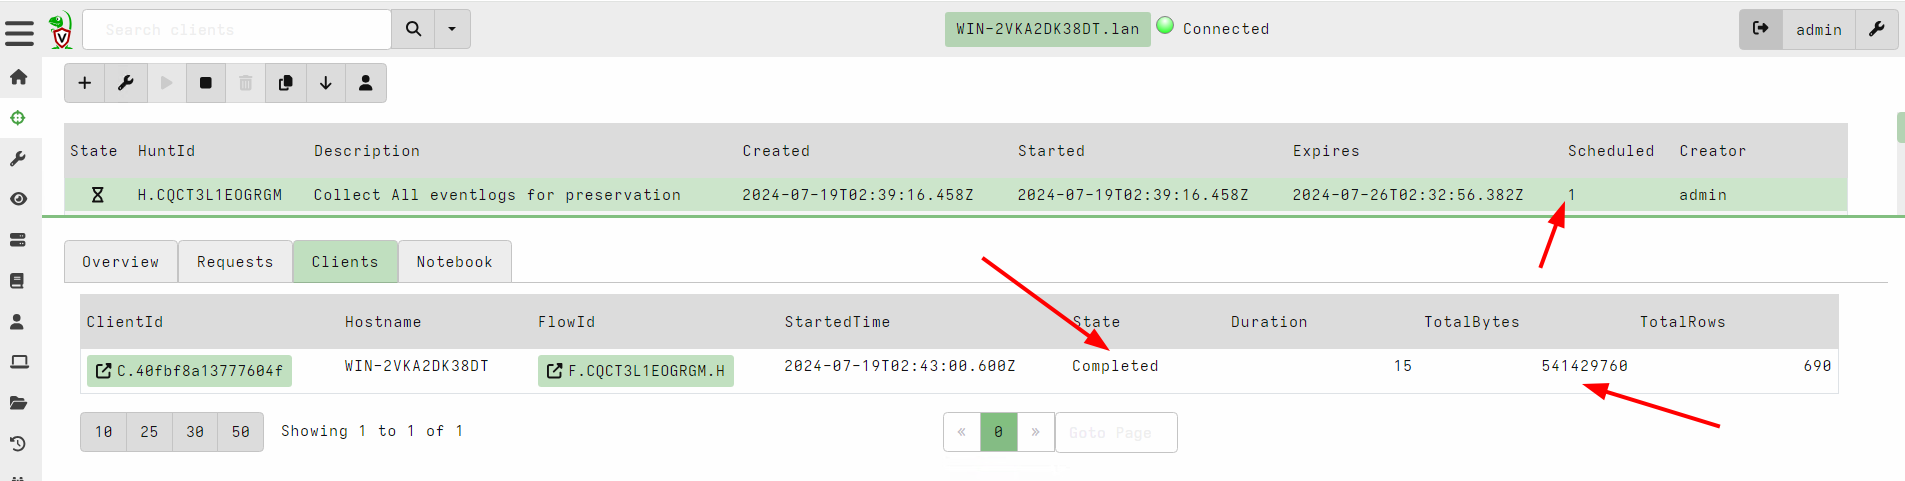
The act of labeling the client will automatically schedule the hunt against that client.
Note that I can use this technique to automatically schedule clients into various hunts using the VQL label() function. Therefore I can use this technique to automatically add clients to various hunts based on previous findings.
Manually adding clients to hunts
You can think of hunts as a group of collections that we can inspect
together. For example we can see all the processes from all clients by
collecting the Windows.System.Pslist artifact across the entire
network in a hunt. Then we can filter across all the processes with
VQL:
SELECT * FROM hunt_results(hunt_id="H.123", artifact="Windows.System.Pslist")
This is very convenient - hunts are really a way to group related collections together.
Normally the Hunt Manager component described above is responsible for scheduling collections on clients depending on certain conditions (e.g. labels or OS matches), and adding them to the hunt. However the scheduling step is a different separate step from adding the collection to the hunt.
It is possible to schedule the collection manually and then also add the collection to the hunt. This method gives the ultimate flexibility in managing hunt membership.
A common example is when a collection needs to be redone for some reason. Normally the hunt manager ensures only a single collection from the hunt is scheduled on the same client. However sometimes the collection fails, or simply needs to be re-collected for fresher data to be added to the hunt.
Using the Windows.Triage.Targets collection created by the above example, we
can redo the collection by navigating to the collection view in that specific
client. We then Copy the collection by clicking the button, which also allows us to update things like, timeout or
change the parameters a bit as required.

This gives us a collection that was created outside of the hunt, and we now want to add that collection to the hunt.
Next, I add the collection to the hunt by clicking the Add to Hunt button.
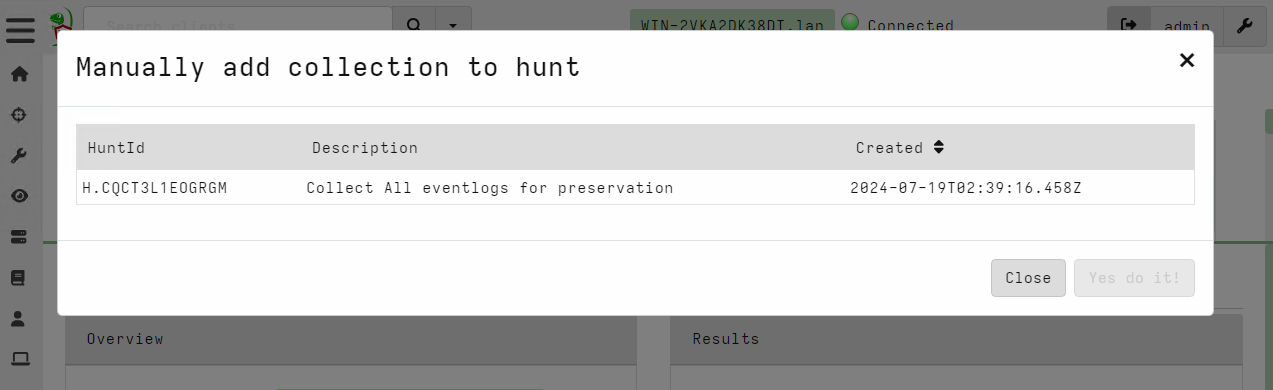
The new collection is added to the hunt. It is up to you if you want to keep the old collection around or just delete it.

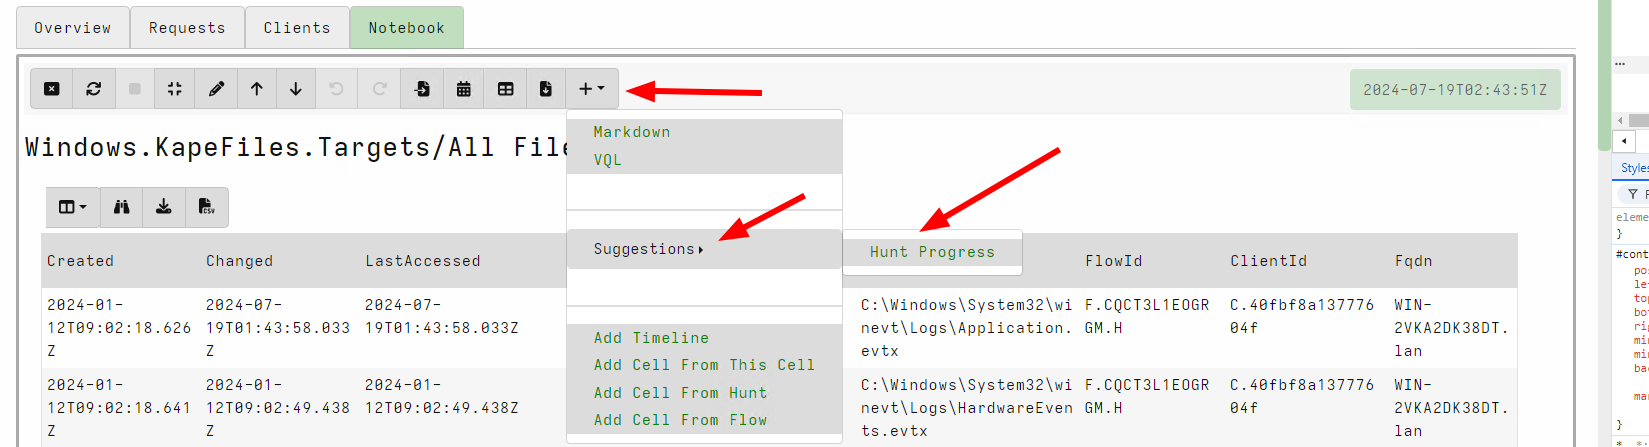
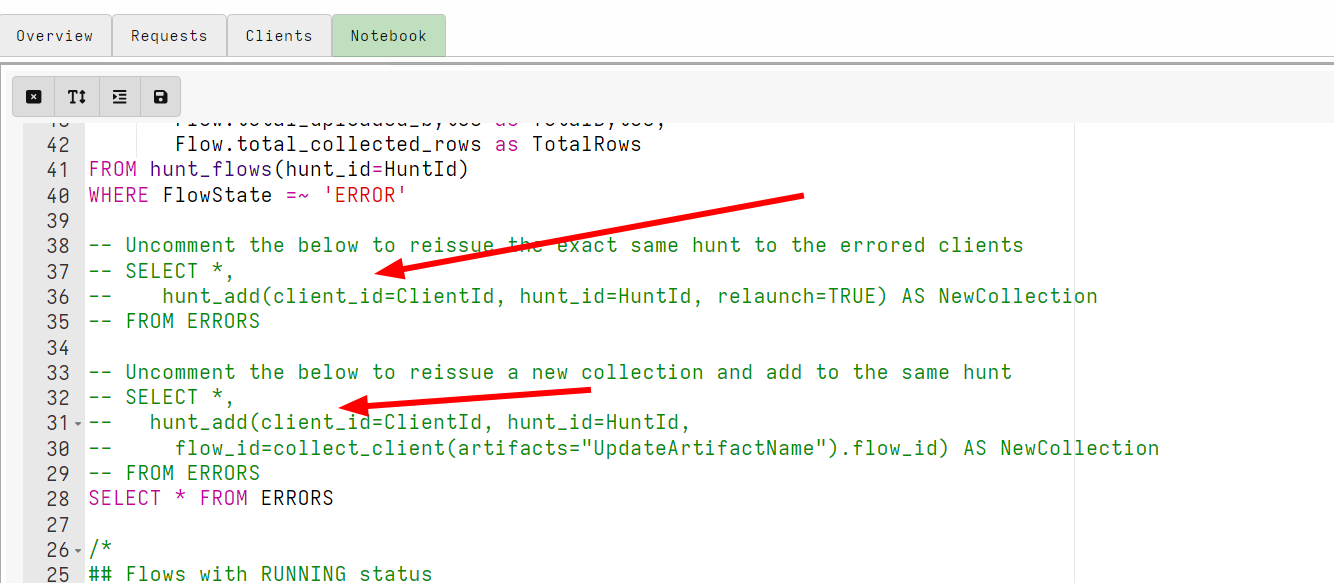
You can add collections to a hunt using the hunt_add() VQL function which allows unlimited automation around which flows are added to a hunt (and it can also be used to automate the relaunching of the collections).
To assist you with managing the hunt progress, hunt notebooks offer a Hunt Progress cell suggestion.