Troubleshooting and Debugging
Troubleshooting deployments
Sometimes things don’t work when you first try them. This page will go through the common issues people find when deploying Velociraptor clients and the steps needed to debug them.
Server fails to start
If the server fails to start, you can try to start it by hand to see any logs or issues. Typically the Linux service will report something unhelpful such as:
# service velociraptor_server status
● velociraptor_server.service - Velociraptor linux amd64
    Loaded: loaded (/etc/systemd/system/velociraptor_server.service; enabled; vendor preset: enabled)
    Active: activating (auto-restart) (Result: exit-code) since Fri 2021-12-31 15:32:58 AEST; 1min 1s ago
   Process: 3561364 ExecStart=/usr/local/bin/velociraptor --config /etc/velociraptor/server.config.yaml frontend (code=exited, status=1/FAILURE)
  Main PID: 3561364 (code=exited, status=1/FAILURE)
You can usually get more information from the system log files,
usually /var/log/syslog. Alternative you can try to start the
service by hand and see any issues on the console.
First change to the Velociraptor user and then start the service as that user.
# sudo -u velociraptor bash
$ velociraptor frontend -v
Dec 31 15:47:18 devbox velociraptor[3572509]: velociraptor.bin: error: frontend: loading config file: failed to acquire target io.Writer: failed to create a new file /mnt/data/logs/Velociraptor_debug.log.202112270000: failed to open file /mnt/data/logs/Velociraptor_debug.log.202112270000: open /mnt/data/logs/Velociraptor_debug.log.202112270000: permission denied
In this case, Velociraptor can not start because it can not write on its logs directory. Other errors might be disk full or various permission denied problems.
Because Velociraptor normally runs as a low privileged user, it needs
to maintain file ownership as the velociraptor user. Sometimes
permissions change by accident (usually this happens by running
velociraptor as root and interacting with the file store - you should
always change to the velociraptor user before interacting with
the server).
It is worth checking file permissions (using ls -l) and recursively
returning file ownership back to the velociraptor user (using the
command chown -R velociraptor:velociraptor /path/to/filestore/)
Debugging client communications
If the client does not appear to properly connect to the server, the
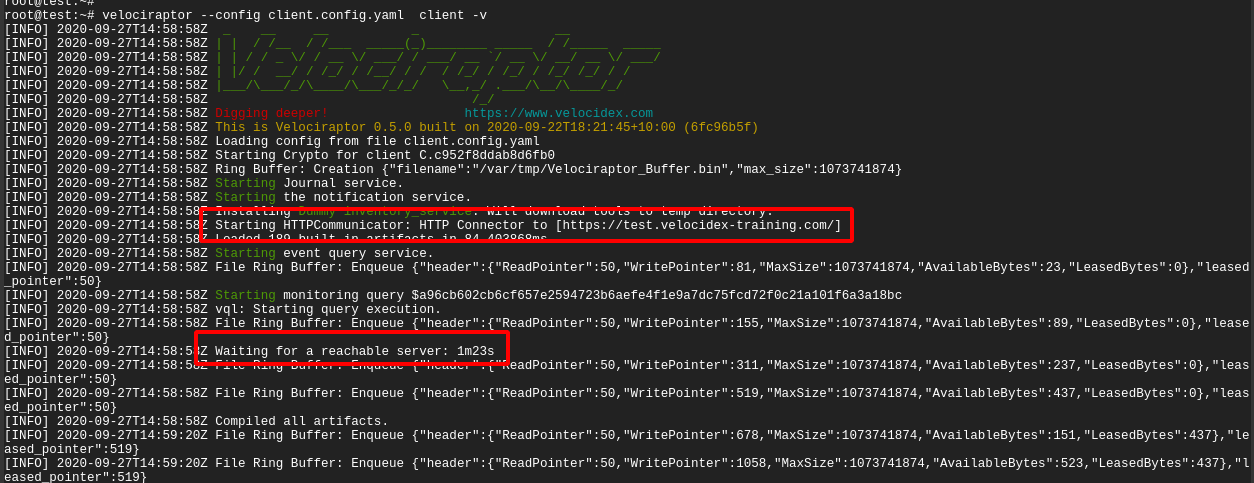
first thing is to run it manually (using the velociraptor --config client.config.yaml client -v command):
In the above example, I ran the client manually with the -v switch. I
see the client starting up and immediately trying to connect to its
URL (in this case https://test.velocidex-training.com/) However
this fails and the client will wait for a short time before retrying
to connect again.

A common problem here is network filtering making it impossible to reach the server. You can test this by simply running curl with the server’s URL.
Once you enable connectivity, you might encounter another problem
The Unable to parse PEM message indicates that the client is trying to fetch the server.pem file but it is not able to validate it. This often happens with captive portal type of proxies which interfere with the data transferred. It can also happen if your DNS setting point to a completely different server.
We can verify the server.pem manually by using curl (note that when using self-signed mode you might need to provide curl with the -k flag to ignore the certificate errors):
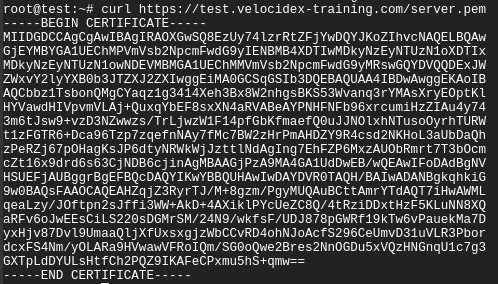
Note that the server.pem is always signed by the velociraptor internal CA in all deployment modes (even with lets encrypt). You can view the certificate details by using openssl:
curl https://test.velocidex-training.com/server.pem | openssl x509 -text
If your server certificate has expired, the client will refuse to connect to it. To reissue the server certificate simply recreate the server configuration file (after suitably backing up the previous config file):
velociraptor config reissue_certs --validity 365 --config server.config.yaml > new_server.config.yaml
Depending on which user invoked the Velociraptor binary, you may need to alter the permissions of the new server configuration file.
For example:
chmod 600 new_server.config.yaml
chown velociraptor:velociraptor new_server.config.yaml
From here, you will need to move the updated server configuration into the appropriate location.
The above step was able to use the internal Velociraptor CA to reissue the server certificate (which is normally issued for 1 year), allowing us to rotate the certificate.
Currently there is no way to update the CA certificate without redeploying new clients (the CA certificate is embedded in the client config file). When generating the config file initially, the CA certificate is created with a 10 year validity.
Debugging Velociraptor
Velociraptor is a powerful program with a lot of functionality. Sometimes it is important to find out what is happening inside Velociraptor and if it doing what is expected. This is important for debugging or even just for understanding what is happening.
To see the inner workings of Velociraptor we can collect profiles of
various aspects of the program. These profiles exist regardless of if
Velociraptor is used in as a client or server or even an offline
collector.
You can read more about profiling in Profiling the Beast
Starting the debug server
When provided with the --debug flag, Velociraptor will start the
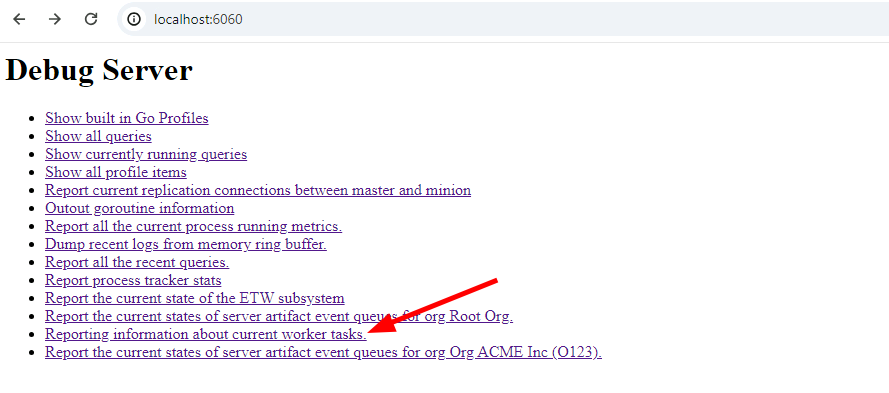
debug server on port 6060 (use --debug_port to change it). By
default the debug server will only bind to localhost so you will need
to either tunnel the port or use a local browser to connect to it.
The debug server has a number of different profiles and new ones will be introduced, so below we just cover some of the most useful profiles you can view.
Notebook workers
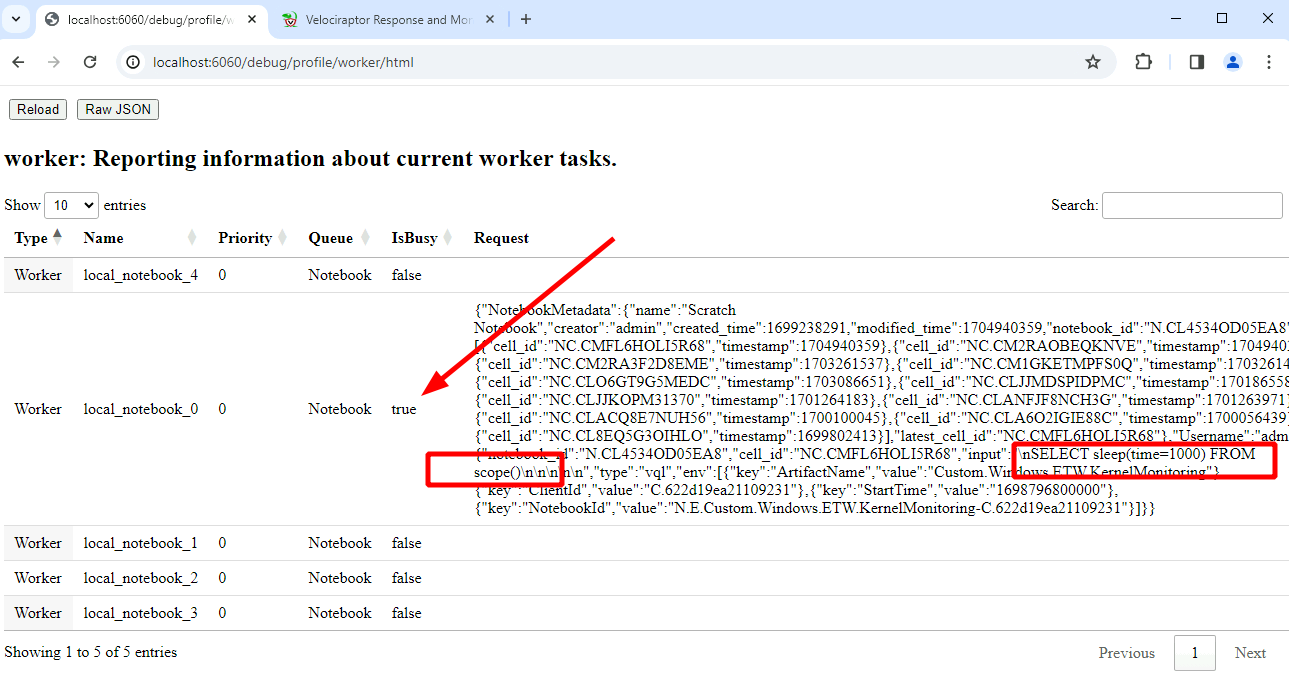
Notebooks are very useful feature of the server allowing for complex postprocessing of collected data. Sometimes these queries are very large and take a long time to run. To limit the amount of resources the queries can take on the server, Velociraptor only creates a limited number of notebook workers (by default 5).
Currently running queries
This view shows the queries currently running in this process. For example queries will run as part of the notebook evaluation, currently installed event queries or in the case of the offline collector, currently collecting artifacts.
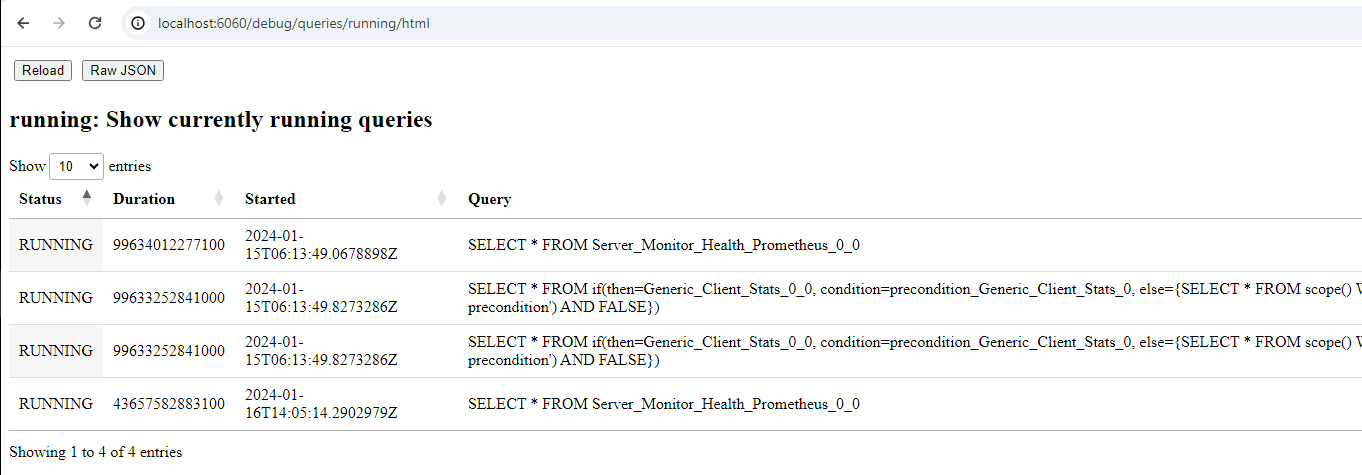
You can also see all recent queries (even the ones that have completed already). This helps to understand what exactly the client is doing.
ETW Subsystem
This profile shows the current state of the ETW subsystem on Windows. We can see what providers Velociraptor is subscribed to, how many queries are currently watching that provider, and how many events were received from the provider.
Go profiling information
For even more low level view of the program execution, we can view the
Built in Go Profiles which include detailed heap allocation,
goroutine information and can capture a CPU profile for closer
inspection.
This type of information is critical for developers to understand what the code is doing, and you should forward it in any bug reports or discussions to help the Velociraptor developer team.
Debugging the offline collector
The offline collector is a one shot collector which simply runs, collects several preconfigured artifacts into a zip file and terminates.
Sometimes the collector may take a long time or use too much memory. In this case you might want to gain visibility into what its doing.
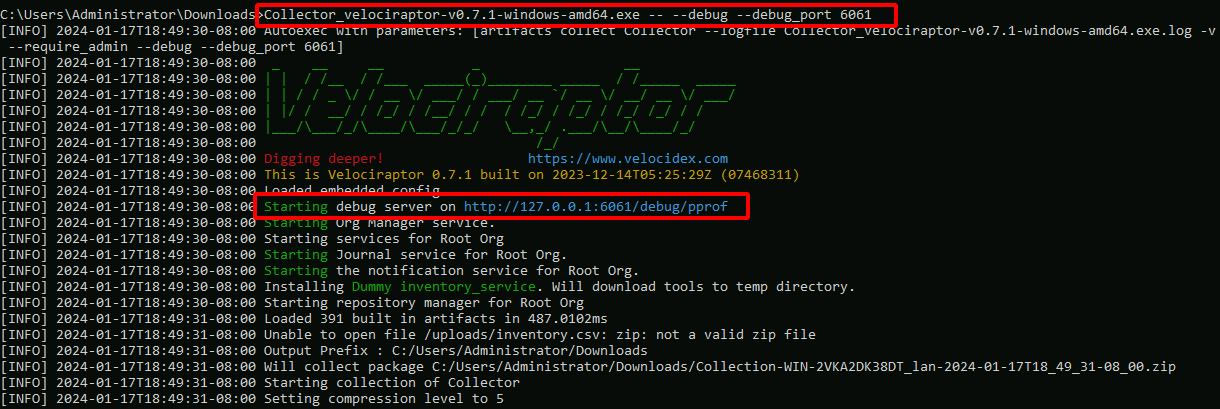
You can start the offline collector by adding the --debug flags to
its execution in a similar way to above.
Collector_velociraptor-v0.74.1-windows-amd64.exe -- --debug --debug_port 6061
Note that the additional -- is required to indicate that the
additional parameters are not considered part of the command line (the
offline collector requires running with no parameters).
The above will start the debug server on port 6061. You can then download goroutine, heap allocation and other profiles from the debug server and forward these to the Velociraptor team to resolve any issues.
Debugging the server
It is also possible to collect the profile from the server without the
use of the --debug flag using the Server.Monitor.Profile
artifact. This is the server equivalent of the
Generic.Client.Profile artifact.
Collecting metrics
When Velociraptor is run in production it is often necessary to build dashboards to monitor the server’s characteristics, such as memory user, requests per second etc.
Velociraptor exports a lot of important metrics using the standard
Prometheus library. This information may be scraped from the
server’s monitoring port (by default
http://127.0.0.1:8003/metrics). You can change the port and bind
address for the metrics server using the Monitoring.bind_port
and Monitoring.bind_address
setting.
You can either manually see program metrics using curl or configure an external system like Grafana or DataDog to scrape these metrics.
curl http://127.0.0.1:8003/metrics | less
We recommend that proper monitoring be implemented in production systems.
