Deployment Example
In this example we will walk through the process of deploying the server using Let’s Encrypt certificates, and optionally an SSO authentication provider.
This is a common deployment choice for long-term deployments (both cloud-hosted and on-premises), or for scenarios where a cloud-based server is required (and where clients will connect to the server via the internet).
Most enterprise systems require an SSO mechanism to manage user accounts and passwords, one reason being that manual user account management simply does not scale. The choice of authentication provider is usually determined by each organizations existing Identity and Access Management (IAM) policies and infrastructure.
Velociraptor supports the most popular SSO providers and protocols. These providers can be a cloud-based IDPs or on-premises IDM solutions.
Before You Begin
Note the following requirements:
- You must use a DNS name as Let’s Encrypt will not issue a certificate for an IP address. The DNS name can be managed via Dynamic DNS.
- Ports 80 and 443 must be publicly accessible. Let’s Encrypt uses both ports to issue certificates.
- You can optionally configure Authentication via one or more SSO providers.
Provision a Virtual Machine
Next we provision a Linux VM from any cloud provider. The size of your VM depends on the number of endpoints in your environment. A standard VM with 8 or 16Gb RAM should be sufficient for around 5-10k clients. Additionally you will need sufficient disk space to hold the data you collect. We recommend starting with a modest amount of storage and then periodically back up and purge old data, or else increase the storage volume size as needed.
Ubuntu is commonly used for production Velociraptor deployments and we use it for testing, so it is generally recommended unless you have a strong preference for something else. If you choose to use another Linux distro then please note that it needs to be one that uses systemd, although most do these days.
The virtual machine must be able to receive connections over both ports 80 and 443. Be sure to check inbound filtering Access Control Lists to ensure that access is allowed. When using SSL, both the client communication and the Admin GUI are served over the same port to benefit from SSL transport encryption. The Let’s Encrypt protocol requires Let’s Encrypt’s servers to connect to the VM on port 80 for the purpose of certificate issuance and renewal, however Velociraptor will only provide services on the SSL-secured port 443.
If you forgot to open port 80, Let’s Encrypt will fail to issue the certificate and repeated failures might result in them blocking the domain name from getting an SSL certificate for several days. If you find that this has happened and you can’t afford to wait, then you will need to change to a new DNS name and start again.
Several Velociraptor features do require outbound access from the server to GitHub, although it is possible for the server to operate without any internet access.
Get a DNS name for your server
An SSL certificate says that the DNS name is owned by the server that presents it. You will need a public DNS name (“A” record) pointing to your Velociraptor server’s external IP. This is because:
- Let’s Encrypt will only issues a certificate for a public DNS name
- DNS names are integral to SSO and therefore required.
Assign an IP address
You can assign your Virtual Machine a static IP address or a dynamic IP address. If you use a dynamic IP address for your server then you must also configure Dynamic DNS.
Velociraptor natively supports updating Cloudflare or No-IP Dynamic DNS, so these are the easiest options to use since they require no external DDNS update mechanism. For other DDNS providers, you can install an external Dynamic DNS client such as ddclient to update your DNS->IP mapping.
After the dynamic address is created, you need to note the credentials (as configured with your DDNS provider) for updating the IP address, as you will need to supply these during Velociraptor’s interactive configuration process.
Prepare the server installation package
Before installing anything we need to prepare by creating the Velociraptor config, and then package that config into a deb or rpm installer package which we will then install on the Velociraptor server.
These pre-installation steps can be done on any platform.
1. Generate the configuration file
Central to every Velociraptor deployment is a YAML configuration file. This file contains all the configuration parameters that define how your server and clients operate, plus cryptographic material that is used to secure several aspects of the deployment, such a client-server communications.
To generate a new configuration file we use the config generate command. The
-i flag tells it to run in interactive mode, which means it will launch a
question/answer dialogue-style “wizard” that will gather the most important
details needed to produce your config.
./velociraptor config generate -i
velociraptor.exe config generate -i
./velociraptor config generate -i
The aim of the wizard is to make it easy to configure Velociraptor in the most common deployment scenarios. Even though these scenarios will not be a perfect fit for everyone, most users should be able to start with these deployment modes and tweak the configuration to their specific needs.
The end result of running the configuration wizard is a YAML configuration file. So there is no harm in doing “dry runs” and examining or comparing resulting files to better understand how the choices affect the resulting configuration.
Deployment Type
On the first screen of the configuration wizard you will be asked to select the Deployment Type.
$ ./velociraptor config generate -i
 Welcome to the Velociraptor configuration generator

 This wizard creates a configuration file for a new deployment.

 Let's begin by configuring the server itself.

┃ Deployment Type
┃ This wizard can create the following distinct deployment types.
┃    Self Signed SSL
┃  ● Automatically provision certificates with Lets Encrypt
┃    Authenticate users with SSO
- If you don’t intend to use SSO, or intend to configure it manually later, then
choose Automatically provision certificates with Lets Encrypt.
This deployment option will enable Basic authentication instead of SSO. - If you do want to use SSO then choose the option Authenticate users with
SSO.
This deployment option also configures the deployment to use Let’s Encrypt certificates.
For either of the above choices the resulting config will specify that Velociraptor’s Frontend (which clients connect to) and GUI listen on port 443, secured by TLS. The certificates will, in both cases, be automatically issued via Let’s Encrypt.
Self-signed SSL with Basic authentication is most often used when Velociraptor is deployed on private networks for temporary situations such as incident response. For long-term deployments, the other modes of operation that Velociraptor offers should be preferred. We describe the process of deploying in this mode in our Quickstart Guide. Self-signed mode is incompatible with SSO authentication.
Also on the first page you will be asked:
- What OS will the server be deployed on? This choice will affect the defaults for various options, mainly path specifications which would be different on Windows. Velociraptor is typically deployed on a Linux machine, although the configuration can be generated on Windows or macOS.
Server configuration
The next few questions on the seconds page of the config wizard relate to the configuration of the server itself:
-
Path to the datastore directory: Velociraptor uses flat files for all storage. This path is where Velociraptor will write it’s files. You should mount any network filesystems or storage devices on this path.
-
Path to the logs directory: The default value is usually acceptable.
-
Internal PKI Certificate Expiration: This internal certificate is generated and stored in the configuration file. This option does not affect the Let’s Encrypt certificates, which are issued and automatically renewed at least every 90 days. You may choose to override the default 1-year certificate expiry if you intend to deploy a long-term server instance.
For the next 2 questions you should probably accept the defaults, unless you’re really sure that you want to change these and understand the impacts. Remember that you can change any option at a later time by manually editing the config file.
-
Do you want to restrict VQL functionality on the server?
-
Use registry for client writeback?
Network configuration
On the third page of the config wizard you will be asked for network-related information for your deployment:
-
The public DNS name of the Frontend?: The clients will connect to the server using this DNS name.
-
DNS Type: As mentioned previously, if your server has a dynamic IP address then you need to have set up DDNS updating for the server’s DNS name. We support Cloudflare and NOIP DDNS providers internally, and if you choose one of these options you will be asked to supply DDNS update credentials. If you are using an external update mechanisms such as dd client, then choose “None - Configure DNS manually”.
-
Would you like to try the new experimental websocket comms?: We recommend this option, especially for large deployments since it provides more efficient client-server communications. However, as the question note advises, you should test that this traffic is not blocked/restricted in your environment before choosing this option.
Authentication configuration
If you initially chose Authenticate users with SSO then you can skip the next section and go to SSO authentication.
Configure Basic Authentication
If you initially chose Automatically provision certificates with Lets Encrypt then on the 4th screen of the config wizard you will be asked to add Admin users.
The initial set of administrator accounts specified here will be stored in the configuration file. When Velociraptor starts, it automatically creates these accounts as administrators in the datastore, so that you can access the Admin GUI.
You typically don’t need to add more than one admin user as additional users (admin or non-admin) can be added after installation. It is common to only have 1 admin user and many non-admin users, with the latter being used for day-to-day DFIR work. So after adding one user you can enter a blank username and password which will allow you to continue.
 Adding Admin User Number 0
 Enter an empty username or Ctrl-C to stop

┃ Username
┃ > admin

┃ Password
┃ > <your_password>
Since you chose to use only Basic authentication you can skip the next step which applies to SSO configuration.
Configure SSO Authentication
If you initially chose Authenticate users with SSO then the 4th screen of the config wizard will ask you to choose your SSO provider and the subsequent screen will ask for details which may vary depending on your choice of provider.
Since this step also requires that you set up SSO at your provider, we refer you to the following Knowledge Base articles which explain the provider-specific steps for an OAuth2 provider and an OIDC provider:
- How to set up authentication using Google OAuth SSO
- How to set up OIDC authentication using Keycloak
The config wizard only presents the most commonly-used providers and options, but we support several others as explained here. It is even possible to add multiple authentication providers.
Once you have completed the SSO configuration you can proceed to the final step in the configuration wizard…
Config Wizard Finish
The final step of the config wizard will offer to write the config file to your working directory.
- Name of file to write:
server.config.yaml
You can accept the default file name and the wizard will then exit.
2. Make any further changes to the config file
At this point you may want to review the generated config file and make any adjustments that you deem necessary.
For example, by default the configuration wizard binds the GUI to only the
loopback interface, 127.0.0.1, to minimize the potential attack surface. If
you have configured SSO authentication you may want to expose the GUI port to
the internet. Note that this is highly discouraged if you are using Basic
authentication.
If you need to access the GUI from other network hosts then open the configuration file in a text editor and change:
GUI:
  bind_address: 127.0.0.1
to:
GUI:
  bind_address: 0.0.0.0
(Please note that only the values 127.0.0.1 or 0.0.0.0 are valid for this
setting.)
If you do decide to expose the GUI to public networks then we recommend you also restrict access to specific IP ranges using the GUI.allowed_cidr setting.
3. Create the server installation package
The server component will be installed and run as a service on your Linux
machine. In addition to installing the Velociraptor binary and configuration file, the
installation also creates a service account (named velociraptor) and
service configuration so that it can run as a service. The installation package
takes care of these setup tasks, and we generate it using a single command.
The Velociraptor binary provides several utility functions on the command line.
One of these is the ability to generate Linux installation packages,
specifically deb packages for Debian-based systems and rpm packages for
RPM-based systems.
To create the server installation package, run the appropriate command below in your working directory.
Debian-based server:
./velociraptor debian server --config ./server.config.yaml
or
RPM-based server:
./velociraptor rpm server --config ./server.config.yaml
The output file will be automatically named to include the version and
architecture, but you can choose any file name you want and specify it with the
--output <your_file_name> flag.
By default, if the --binary flag is not specified, then the installer package
will be created using the binary that invoked the command. To package a binary
for a different architecture, for example arm64, you must specify the binary in
the command.
The server installation package that we created also contains a copy of the server config, so you should handle it with the same security considerations as the config file itself.
A compromise of the file will allow access to private key material enabling a MITM attacks against Velociraptor.
If you did not perform the previous steps on your server then you will need to copy the server installation file to your server. For example, you could push the debian package to the server using Secure Copy Protocol (SCP):
scp velociraptor_server.deb user@123.45.67.89:/tmp/
Install the server component
Install the server package using the command below according to your server’s packaging system.
Debian-based server installation:
$ sudo dpkg -i velociraptor_server_0.74.2_amd64.deb
Selecting previously unselected package velociraptor-server.
(Reading database ... 527396 files and directories currently installed.)
Preparing to unpack velociraptor_server_0.74.2_amd64.deb ...
Unpacking velociraptor-server (0.74.2) ...
Setting up velociraptor-server (0.74.2) ...
Created symlink /etc/systemd/system/multi-user.target.wants/velociraptor_server.service → /etc/systemd/system/velociraptor_server.service.
or
RPM-based server installation:
$ sudo rpm -Uvh velociraptor-server-0.74.2.x86_64.rpm
Verifying...                          ################################# [100%]
Preparing...                          ################################# [100%]
Updating / installing...
   1:velociraptor-server-0:0.74.2-A   ################################# [100%]
Created symlink '/etc/systemd/system/multi-user.target.wants/velociraptor_server.service' → '/etc/systemd/system/velociraptor_server.service'.
Now that the service is installed we can check its status in a few ways.
Check the service status:
$ systemctl status velociraptor_server.service
● velociraptor_server.service - Velociraptor server
     Loaded: loaded (/etc/systemd/system/velociraptor_server.service; enabled; vendor preset: enabled)
     Active: active (running) since Tue 2025-04-08 12:25:34 SAST; 3min 5s ago
   Main PID: 3514 (velociraptor.bi)
      Tasks: 19 (limit: 4537)
     Memory: 67.2M
        CPU: 4.249s
     CGroup: /system.slice/velociraptor_server.service
             ├─3514 /usr/local/bin/velociraptor.bin --config /etc/velociraptor/server.config.yaml frontend
             └─3522 /usr/local/bin/velociraptor.bin --config /etc/velociraptor/server.config.yaml frontend

Apr 08 12:25:34 linux64-client systemd[1]: Started Velociraptor server.
Check that the Frontend and GUI are listening:
$ nc -vz 127.0.0.1 443
Connection to 127.0.0.1 443 port [tcp/*] succeeded!
Check that the connection is secured by Let’s Encrypt SSL:
$ openssl s_client -connect 127.0.0.1:443 -showcerts
Log in to the Admin GUI
The Admin GUI should now be accessible with a web browser by connecting to
https://<your_server_name>.
Log in using either an admin account that you created in the config wizard (if not using SSO), or one of the authorized accounts you created during the SSO setup procedure. For SSO you will first be directed to the SSO provider’s login page and then, once authenticated, you will be redirected back to the Velociraptor application.
You will then arrive at the Welcome screen.
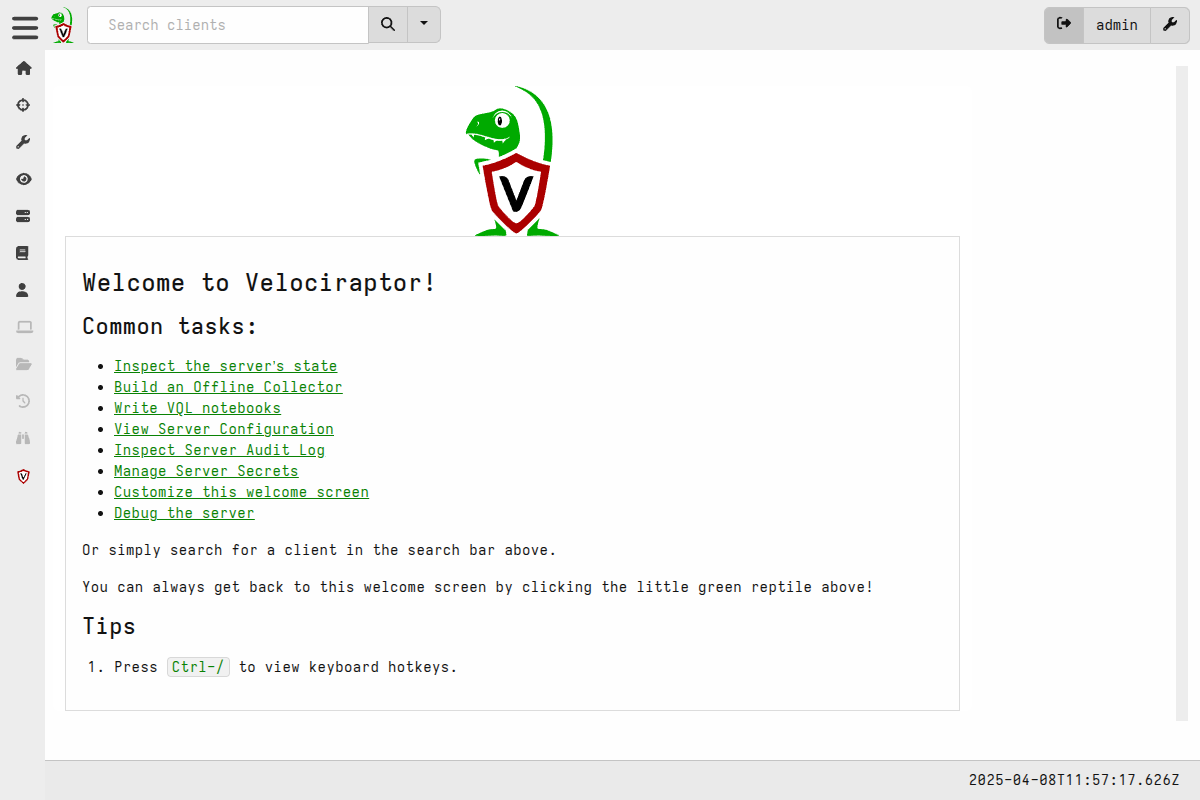
You can learn more about the Admin GUI here.
Import artifacts from external projects
Over time Velociraptor has spawned many sub-projects for curating and managing certain larger, more complex artifacts.
As some artifacts became more complex and powerful, we moved them into separate projects so that they could be developed and managed independently of the main Velociraptor project. Splitting these off allows for independent release cycles, thus facilitating more rapid development and innovation.
Although Velociraptor ships with hundreds of built-in artifacts we recommend that you also try these more powerful artifacts, or visit their websites to learn more. Generally the built-in artifacts have very specific goals, for example extracting specific information from a specific file, while the complex artifacts encompass broader goals, for example searching the Windows registry for a broad set of indicators of suspicious activity.
| Project | Description |
|---|---|
| Velociraptor Sigma Project | Artifacts that implement Sigma-based triage and monitoring rules. Includes curated Sigma Rules (Hayabusa/Hayabusa Live/ChopChopGo) |
| Velociraptor Triage Project | This project intends to develop a set of rules that are used for specifying the collection of files from the endpoint. |
| Rapid7Labs | Artifacts developed and shared by Rapid7 Labs. |
| Velociraptor Registry Hunter Project | Our project to develop sophisticated registry analysis modules. |
| Velociraptor SQLite Hunter Project | This project aims to be a one-stop shop for SQLite, ESE and many other database-oriented forensic artifacts. |
| The Velociraptor Artifact Exchange | Our repository of community-contributed artifacts. |
To get these external artifacts into your Velociraptor server’s artifact repository, we have a built-in server artifact which will download them from any or all of the external sources. Here’s how to do that:
-
On the Welcome screen, click the link Import Extra Artifacts. This will start the artifact collection wizard for the server artifact
Server.Import.Extras.You don’t need to change anything here and can click Configure Parameters to navigate to that page of the wizard.
-
By default, the artifacts from all sub-projects will be imported by the
Server.Import.Extrasartifact. However you may not want all of them at this time and you can repeat this process at any time to import different artifacts or to update selected artifacts. To unselect any item, click it’s bin icon in the list.Once you’re happy with your selection you can click Launch to begin the import process.
-
Once this artifact collection completes you can inspect the results in the collection’s Results tab. If, for some reason, the import fails then you can review the log messages in the Log tab.


What’s next?
Click on the little dinosaur at the top left of the GUI to return to the Welcome page. On this page you’ll find shortcuts for several commonly performed tasks associated setting up a new server.
Typically the next step after installing a new server is to create a new
org
(if you want to manage separate sets of clients) or create installer packages
for Windows or Linux clients for the (default) root org. There are links on
the Welcome page to help you with these tasks.
If you create a new org using the Server.Orgs.NewOrg artifact it will, by
default, also create Windows and Linux client installers for that org.
Then see the Deploying Clients page for guidance on how to install the client packages.
After installing your first client, here are the next steps you may want to consider: