Building Offline Collectors
Offline collectors can be created in the GUI or using the CLI.
The GUI is the recommended way to create them as it provides an intuitive
collector builder wizard that makes the process quick and easy. For advanced use
cases, such as automating the creation of collectors in a separate build
environment, the collector CLI command is often preferred, and we refer you to
the command’s documentation
for further information on that option.
Here we will discuss the GUI-based method.
The offline collector builder
The Offline Collector Builder is simply a GUI wrapper around the
Server.Utils.CreateCollector server artifact, so much of it will seem familiar
as many of the options are the same as you’d see when collecting any other
server artifact.
You can start the offline collector builder using either:
- the button in the toolbar on the Server Artifacts screen
- the link on the Welcome screen (from version 0.75).

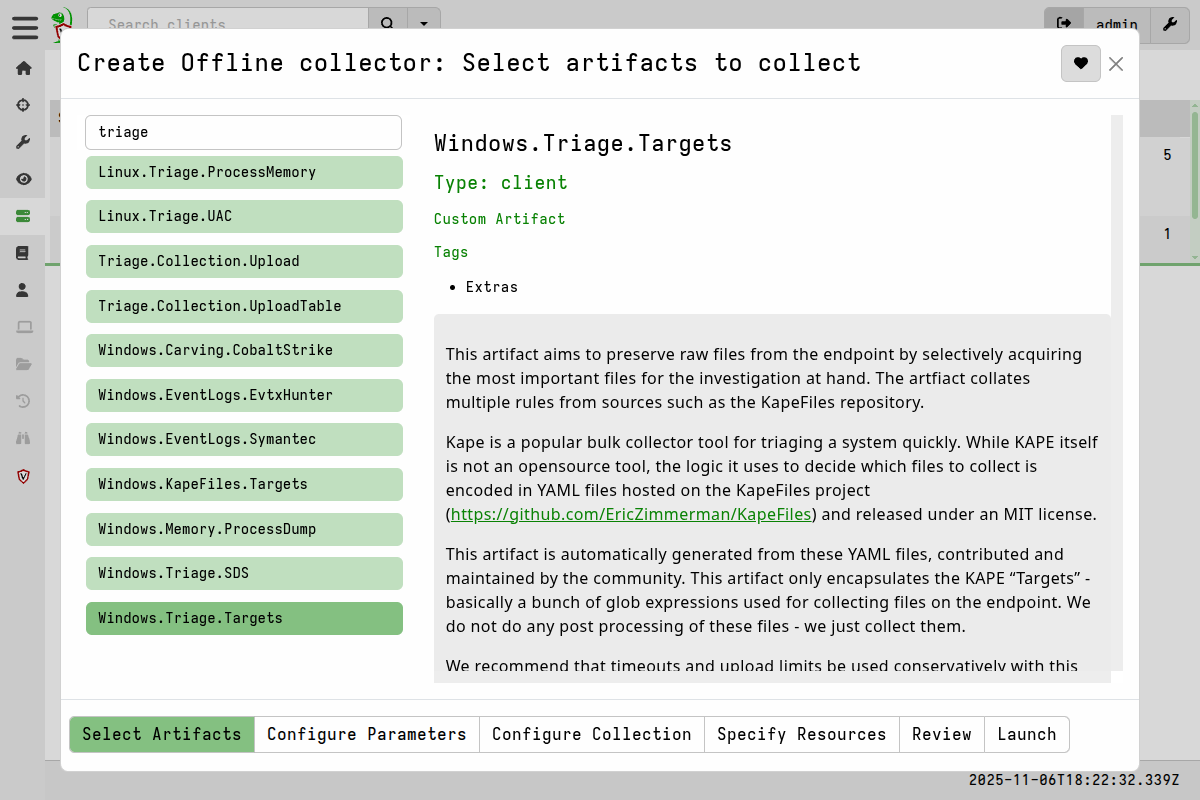
- The Select Artifacts page is exactly the same as the one you would see if you were configuring a normal collection for a single client or for a hunt.
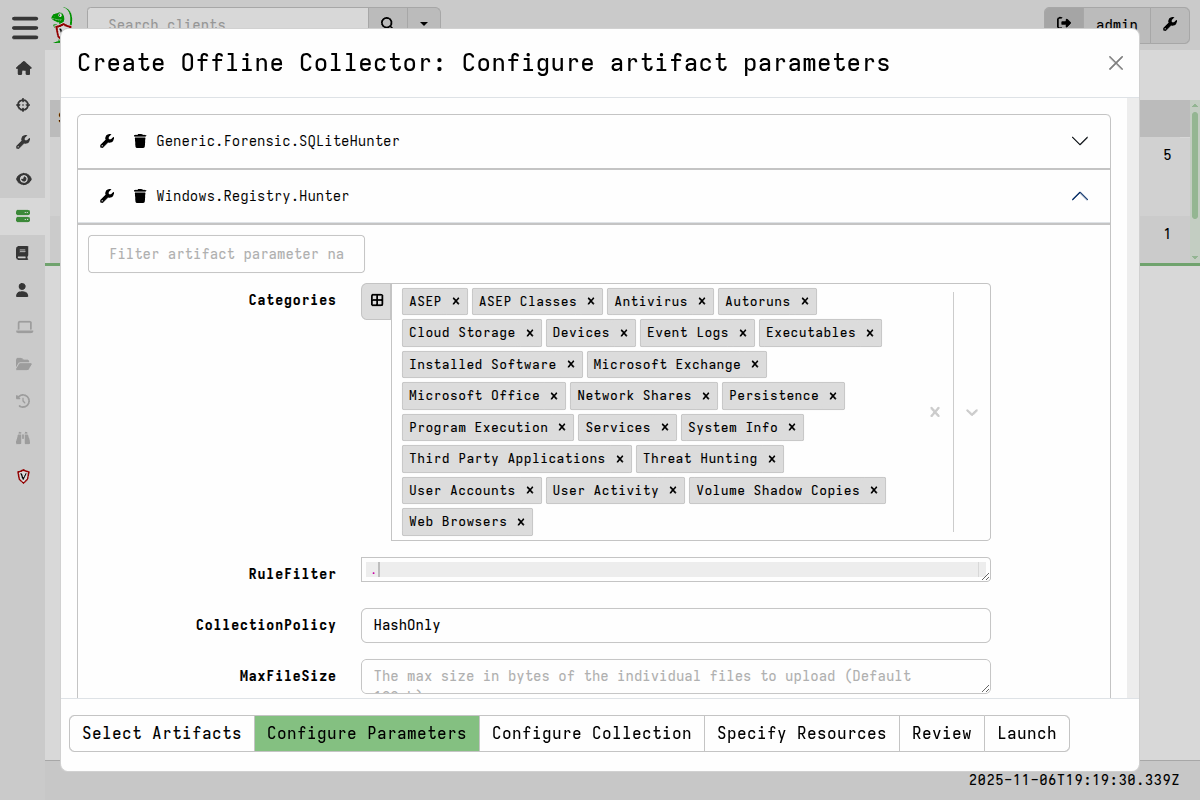
- On the Configure Parameters page you can edit the parameters for any of the artifacts selected in the previous step. Here you can also remove artifacts from your selection if needed.
- The Configure Collector page is where you select the options that determine how the offline collector will be built, and key aspects of it’s runtime behaviour.
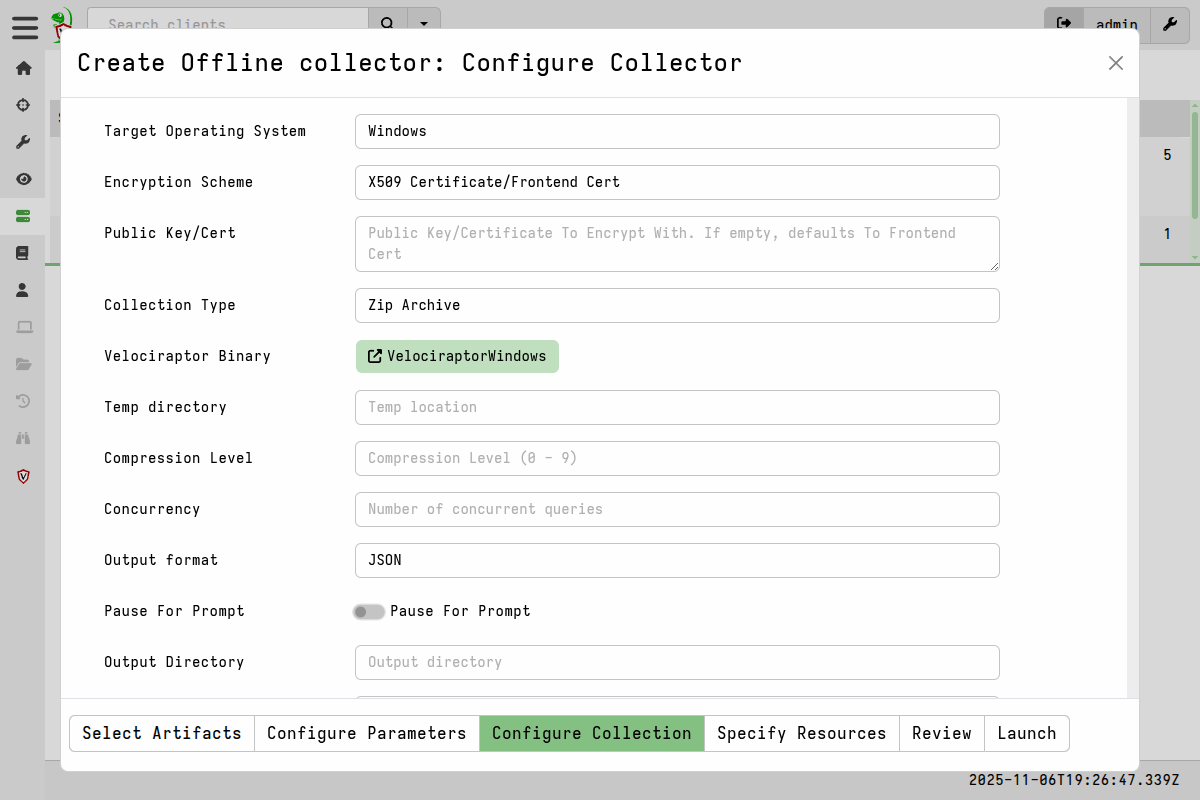
Collector Options
-
Target Operating System
This specifies the target platform and architecture of the Velociraptor binary that the collector config will be packed into. The choices cover the most commonly used Velociraptor binaries. Note that the list also includes the Generic collector option which is platform-independent.
The option you choose will change the Velociraptor Binary tool button on the collector options form. Normally you don’t need to do anything with this field, but it helps to understand what it means: The target binary that will be used is defined as a Velociraptor tool and the server will attempt to download it from GitHub. If your server has no internet access then this obviously won’t work, so in that case you’ll need to manually upload the binary.
-
Encryption
As explained here, the zip archive used to store the collection results can be secured with encryption. Additional fields for the encryption key (certificate) or password will be displayed depending on which option you select.
-
Collection Type
By default, Velociraptor’s offline collector will create a ZIP file containing all the collected files and artifacts. However, this zip file is normally large and we may not want to rely on the person collecting the data to handle sending us the archive file. Instead, Velociraptor’s offline collector can upload the collected archive to a remote location automatically when the collection is done.
This option determines the destination of the collection container. Additional fields will be displayed relevant to the option that you select.
-
Zip Archive: This is the default option. The collection zip will be stored in the same directory that the collector is run from. -
Google Cloud Bucket: The zip file will be uploaded to a Google Cloud Storage bucket. -
AWS Bucket: The zip file will be uploaded to an AWS S3 bucket. -
Azure SAS URL: The zip file will be uploaded to Azure blob storage using a SAS (Shared Access Signature) URL. -
SMB Share: The zip will be uploaded to a SMB share, authenticating with a username and password. -
SFTP Upload: This allows the collector to upload the file to an SFTP server authenticating using a private key.
-
-
Temp directory
A directory on the endpoint to write tempfiles in. Depending on your target endpoints, you might want this to be a secondary hard drive or other location. This directory is also where any tools will be extracted to and run from on the endpoint, so a fixed path might be needed for purposes such as anti-malware exclusions.
-
Compression Level
The level of compression to apply to the collection container zip. 0 means no compression (and fastest), while 9 means maximum compression (and slowest). The default is 5. Keep in mind that this always implies a trade-off: greater compression means it takes longer to produce the zip, but then it ultimately uses less disk space and is a smaller upload.
-
Concurrency
The number of concurrency queries that the collector will run. By default the collector will run 2 queries simultaneously. The appropriate setting depends on factors such as:
- how tolerant of resource usage the endpoint is under the circumstances.
- the urgency of the situation (in emergencies it might be acceptable to use all available resources).
- how many artifacts your collector will run. More artifacts will obviously take longer, but resource constraints (e.g. disk read speed) on the endpoint might make it pointless to try run more artifacts simultaneously.
- the type of resources that each artifact uses. For example one artifact may be CPU-intensive while another may be disk-intensive, so running them together will make good use of the available resources.
We recommend that you perform testing of your intended collections on representative systems before deciding to adjust this setting.
-
Output format
Whether to also include CSV-formatted results in the collection container. By default we only include JSON-formatted results and these are the ones that are used when importing the collection archive on the server.
However, if you intend to work with the results without importing the collection container - possibly using other tools - then you might find the CSV format more convenient.
-
Pause For Prompt
If the offline collector is launched on a Windows endpoint from Explorer (i.e. using the mouse to run it) then it opens in a terminal and displays verbose output. This allows a person running it to watch for errors or issues, as well as generally seeing what it’s doing. Upon completion the terminal windows will close. This option causes the collector to present a “press Enter to continue” prompt at the end of the collection, thus keeping the terminal open and allowing the user to check for any errors or issues.
-
Output Directory
The location to write the collection container zip to. Since these can be quite large you might not want the file writing to the same current working directory (where the collector was run from). You might want to specify a secondary hard drive or a mapped drive to write over the network.
-
Filename Format
The filename to use for the collection zip, optionally including template variables. Environment variables will be expanded as well as the following:
%Hostname%,%FQDN%and%TIMESTAMP%. -
Collector Name
The filename to use for the collector itself. This does not support environment variables. The default name for collectors is
Collector_+ the inventory tool name of the selected binary, e.g.Collector_velociraptor-v0.75.5-linux-amd64-musl. -
Delete Collection at Exit
For choices of Collection Type (see above) that instruct the collector to upload the collection zip, the file is first written locally before it is uploaded. If you select this option then the collector will delete the file after the upload completes successfully. It will also delete the corresponding log file that gets created alongside the collection zip.
Some users prefer to also keep the local copy as a backup, so selecting this option depends on your situational needs.
Obviously choosing this option makes no sense if you chose the “Zip Archive” collection type because that selection doesn’t perform an upload. So the “delete collection at exit” option would delete the local copy, leaving you with nothing.
-
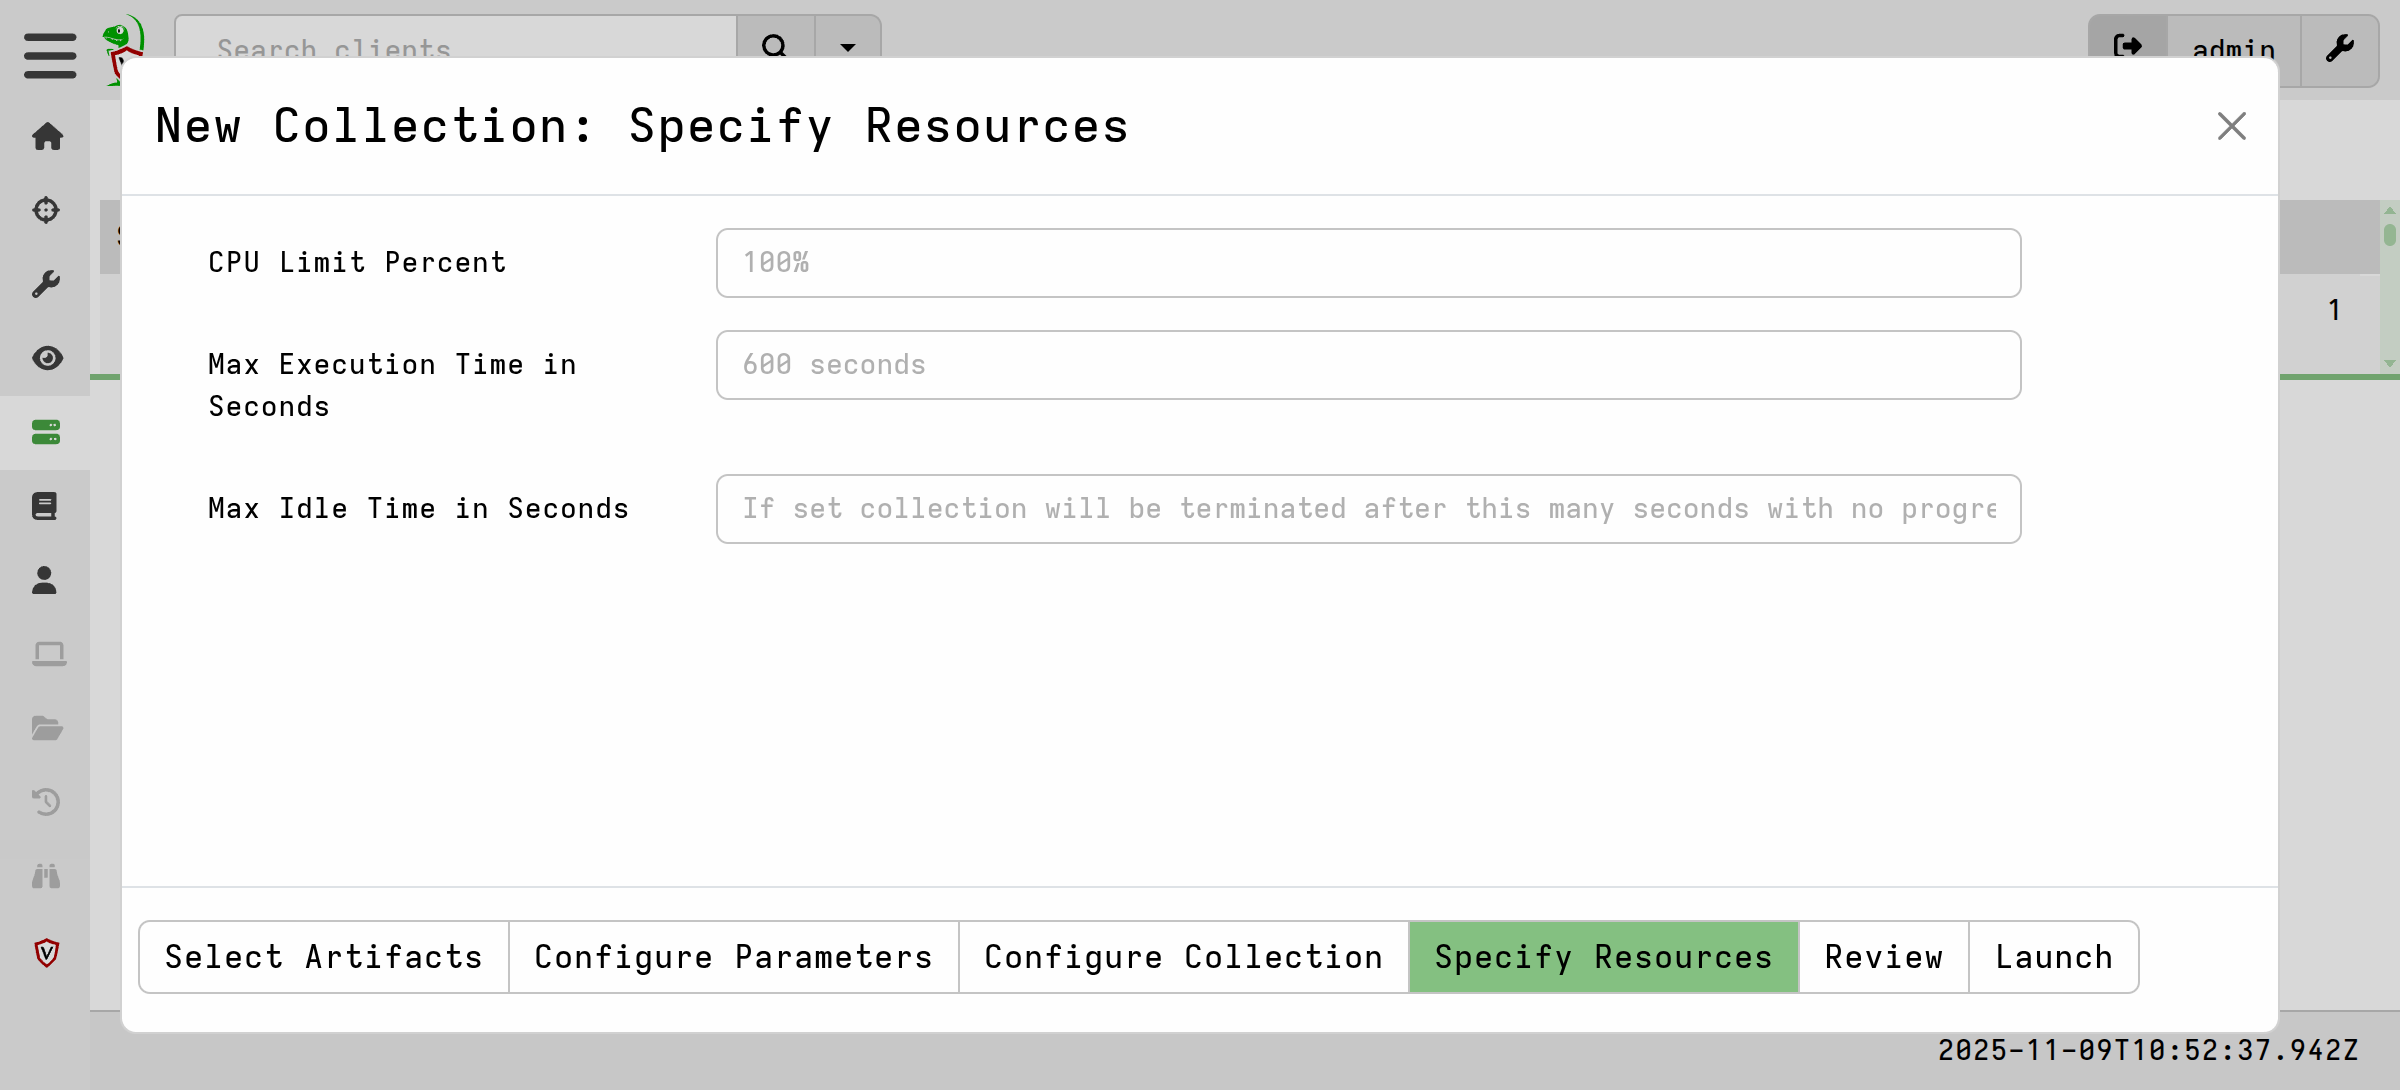
The Specify Resources page is where you specify resource limits that apply to all queries in the collection. With offline collectors, although we allow setting collection-wide resource limits, resource usage is generally not considered as critical as it is with the client-server collections. Typically offline collections can tolerate much larger resource impacts because they is often supervised (usually by a human watching the collection proceeding interactively) and done under emergency conditions. Also with offline collections you often don’t get a chance to repeat the collection if the first attempt failed due to an unnecessary or ill-considered limit.
By default offline collectors have no collection timeout. This is because the associated collections are typically much larger than would be used in client-server deployments where iterative collections are possible, and because a collection timeout would cause a lot of pain, frustration and anger in situations where it might not be possible to re-run the offline collection.
Resource limits defined in the artifacts themselves are ignored, unlike in client-server collections.
-
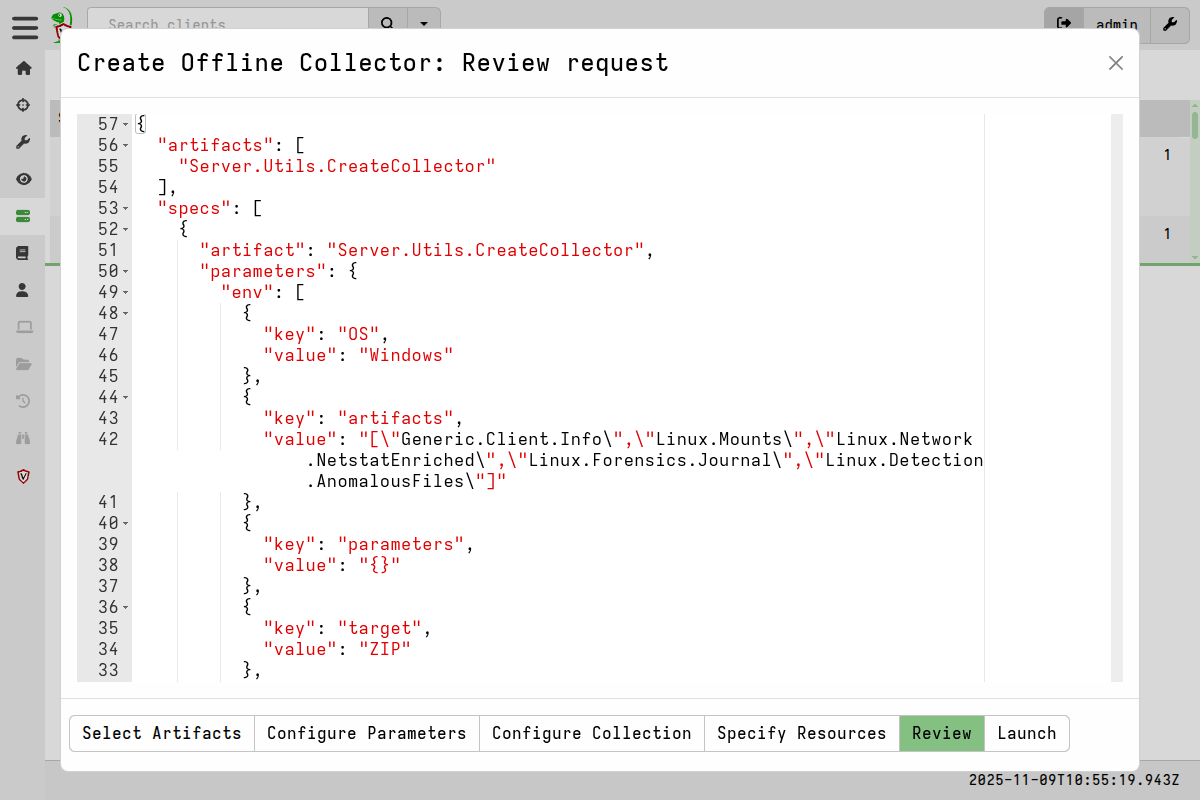
On the Review page you can review the collection request that has been generated corresponding to your selections, and which will be passed to the
Server.Utils.CreateCollectorartifact to build the collector. -
When you hit Launch, the offline collector builder creates a server collection using the
Server.Utils.CreateCollectorartifact.
Once that collection is completed, it will contain the offline collector binary in it’s Uploaded Files tab. From version 0.75.5 a spec file will also be available in the Uploaded Files tab - this file contains the specifications used to create the collector and can be used to reproduce the collector on the command line.

Including third party binaries (tools)
Sometimes we want to collect the output from other third-party executables. Velociraptor can package them into with offline collector and the artifacts that use them can include their output in the collection results. In Velociraptor we refer to such external files as tools, which can be executables or any other type of file that you want to use on the endpoint during the collection.
Offline collectors fully support external tools, in the same way that Velociraptor clients do. However since the offline collector can’t expect to receive the tools from the server during runtime, when creating the offline collector Velociraptor will automatically bundle any tools that are specified in the selected artifacts into the offline collector.
When building an offline collector Velociraptor will automatically
download any required files for inclusion in the collector. This
download uses the url value specified in the tool’s definition. Tool
files are cached in the server’s datastore so the next time the
command is run it will reuse them without downloading.
Tools are bundled the same way into the Generic Collector if you decide to use that option.
Overriding the default Velociraptor binaries
The Velociraptor binaries that will be used for creating offline collectors are
themselves defined as tools in the
Server.Internal.ToolDependencies artifact. This is a built-in artifact that is
updated with each Velociraptor release.
Using the tool definitions in this artifact, Velociraptor will download the latest binary for the selected platform/architecture from GitHub, if it is not already present in your server’s tools inventory. This ensures that when you create a new offline collector it will be created using the release version for the selected platform corresponding to your server’s version.
You can override a specific binary by clicking on the tool button to access the the tool management screen, and then manually upload a different binary.

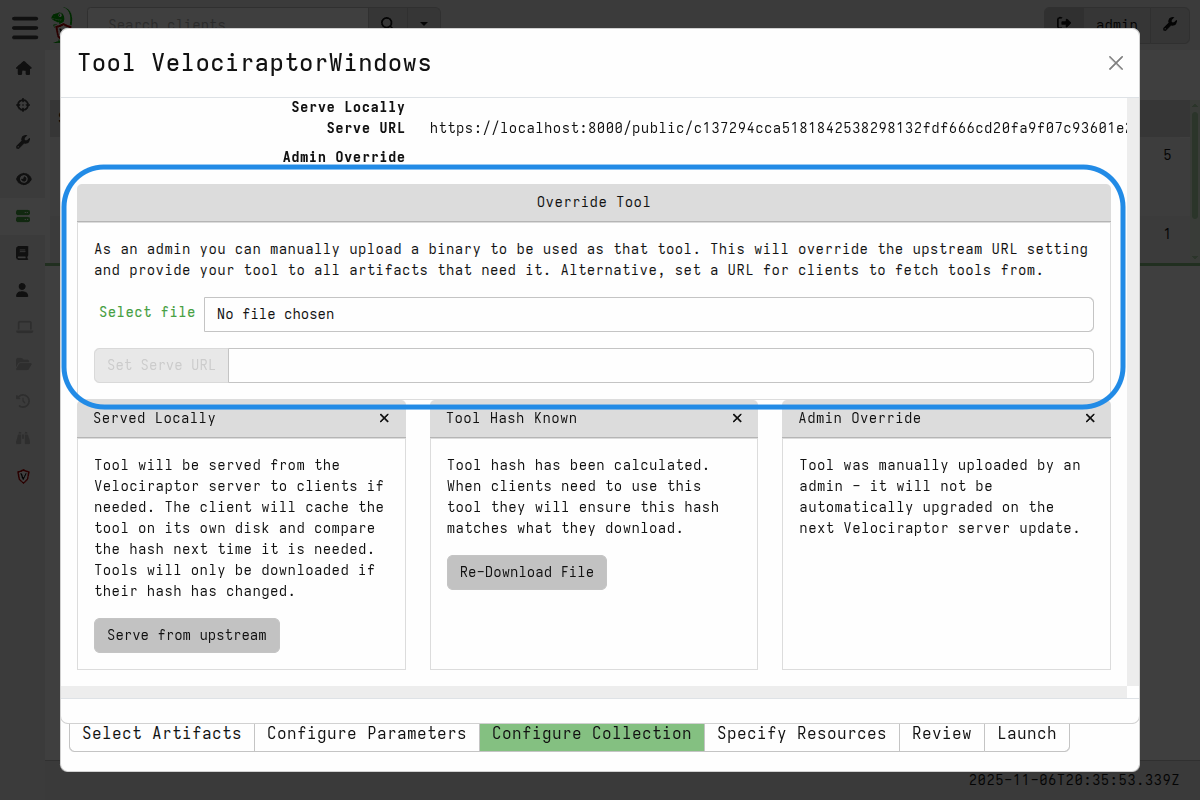
We call this an “admin override”. This is rarely done but might be necessary in some circumstances, for example:
-
you need to create a collector for an unusual architecture that isn’t provided by default - perhaps one that you’ve compiled yourself.
-
you need to create a collector using an older binary version.
-
you need to create a collector using a bugfixed pre-release version.
-
your server does not have internet access to download the required binary.
Although in all the abovementioned cases except the last one, you could alternatively create a Generic Collector which is binary-agnostic and can be used with any standard Velociraptor binary. The generic collector allows you to quickly switch between binaries which is very useful if you encounter an issue which you think might be version-related.
Reverting admin overrides for collector binaries
If you have performed an admin override you can revert to the version defined in the tool definition by clicking the Re-Download File button on the tool’s management screen.
There are a number of ways to access the tool management screen for any particular tool: Any artifact that uses a tool will display a button that opens the tool management screen for that tool. The tool button is visible when you prepare to collect the artifact, or view it in the Artifacts screen, or in any screen showing an artifact preview for the artifact (for example in a collection or hunt’s Overview tab).
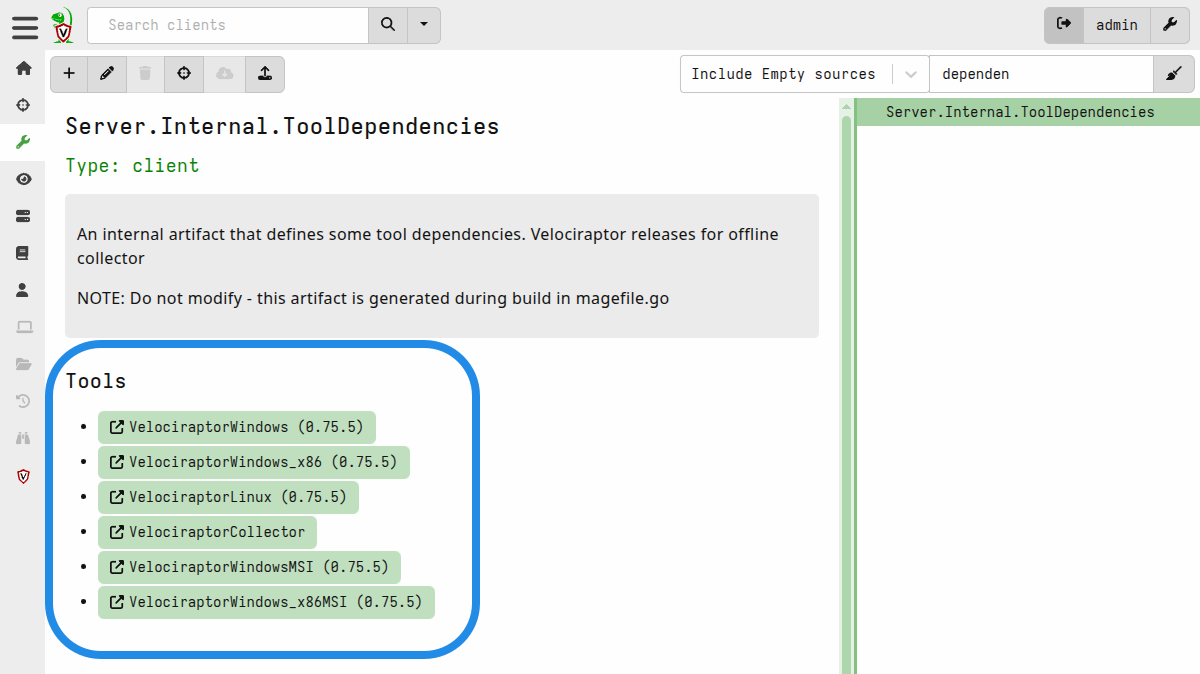
Since the binaries that the collector builder uses are all defined in the
Server.Internal.ToolDependencies artifact, it is probably easiest to use the
Artifact Viewer page:
Downloading the binaries in air-gapped environments
For the scenario where your server doesn’t have internet access (to GitHub), it is possible to pre-populate the server’s tools inventory with all the tools currently defined in the tools inventory (at least all the ones that have download URLs defined). This includes all the Velociraptor binaries that the offline collector builder might use. Once the binaries are in the server’s tools inventory, Velociraptor won’t try to download them when you run the the collector builder.
To facilitate this process we provide a built-in server artifact that partially
automates the process:
Server.Utils.UploadTools
This artifact is designed to be used as follows:
-
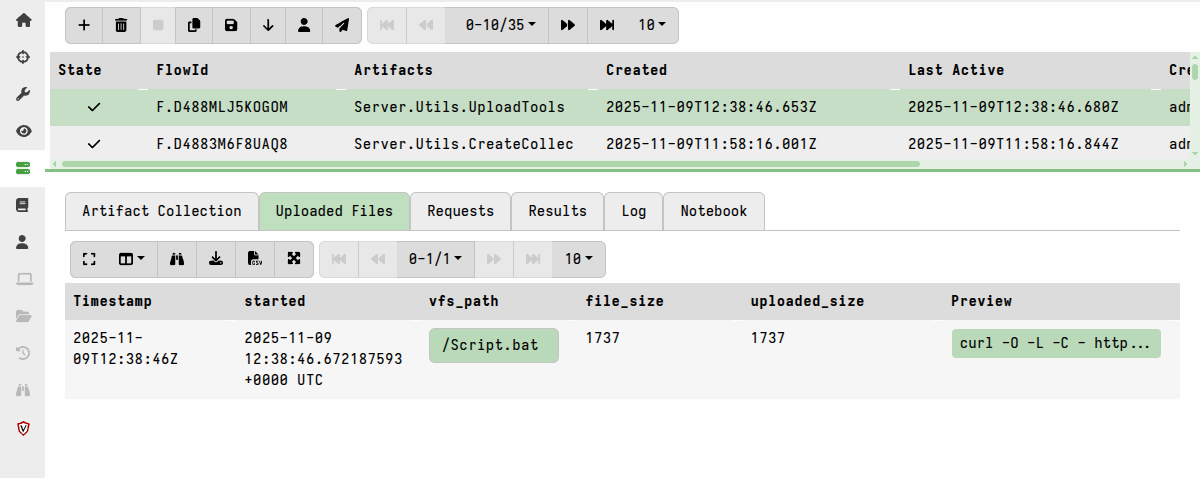
The first time you collect it, it will create a downloader script which you can find in the collection’s Uploaded Files tab. The script uses
curlto download the binaries into the current folder. Copy that script to a system that has internet access and that has curl. -
On the previously mentioned internet-connected system, you create a folder and then run the script produced in the first step from that folder. This downloads all the binaries to the current directory. Note that this can be done on any machine that has internet access and curl.
-
Then copy the folder containing the binaries back to your Velociraptor server, and there you run the same artifact a second time, but this time pointing it to the folder using the artifact’s
BasePathparameter. This step loads all the binaries into the tools inventory.
You can then run the collector builder and it won’t try to download the binaries since they are now in the server’s tools inventory.
Remote Upload Destinations
When collecting evidence with the offline collector we often need to upload large quantities of data. While cloud based uploads are convenient they are usually slower than uploading to a local LAN and might result in network bottlenecks as many systems in the local network are saturating internet uplinks.
In these cases it is more practical to set up a local “dropbox” upload server which will collect collections from systems within local on-premises network segments instead.
There are several options for that:
- A Windows file share can be created on a Windows system.
- An SFTP server can be installed on a local Linux system.
- A local S3 server can be installed using MinIO
A common thread between these options is to ensure that credentials are only allowed to upload new files and not download these files again. Since the offline collector must include credentials within the configuration file, we need to ensure these credentials can not provide additional access to what is required.